Dirt Bike Tire Shelves
One of the fun projects i did in our Baby Boy’s room was Dirt bike tire shelves. I put his crib on the largest wall with his name above the crib. The wall is so large I didn’t want only his name I thought some type of shelves would look good. We had already decided on the Motocross theme so we decided to give it a try making shelves from old tires.
You can watch the video for the step by step if you are more of a visual person if not, the directions are below.
Supplies Needed:
1.Old dirt bike tire
2.Razor blade/Some to cut a tire
3.Pliers
4.Wood
5.Circular saw
6.Black Spray paint
7.Screws
8.Drill
Step 1- Cut Tire in half
Landon was in charge of cutting the tire. The tire was easy to cut but the wire inside the tire was a bit more difficult. Once you get through all the rubber there is a section with wire running on the inside. This is where we used the pliers and just kept bending them until the wire broke. Once the tire was all cut Landon shined it up with some tire shine so It wasn’t so dirty.
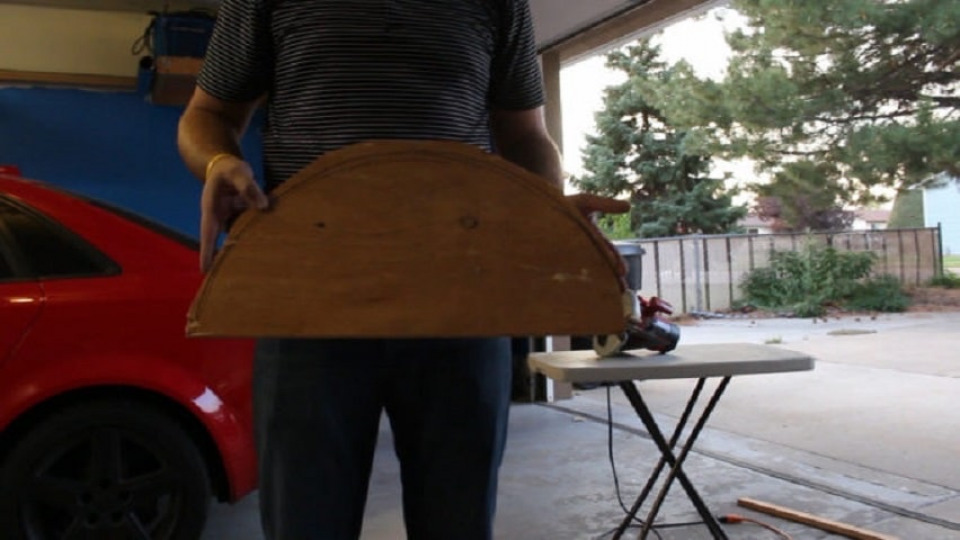
Step 2- Cut half circles
Thankfully, when we moved into our house the owners before us left a ton of scrap wood in the shed. Which has given me multiple opportunities for crafting ? Anyway, you will want to cut the wood in a half circle so it fits inside the tire. Make sure you cut the wood a little bigger than the inside diameter of the tire. That way it will hold and not fall off.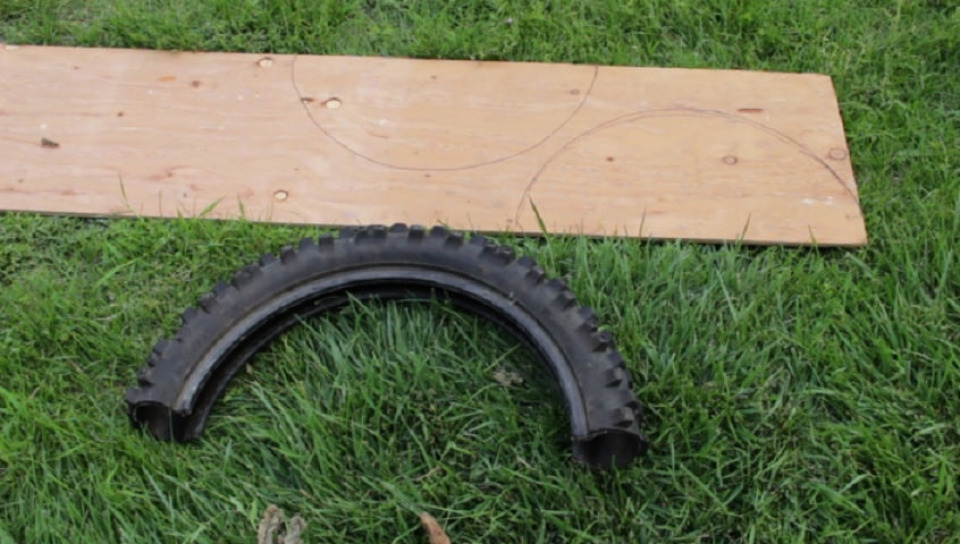
Step 3- Make T shaped brace and attach to wall
We made the brace just big enough to fit under the half circle shelf top. Once you make the brace you will then need to find the studs in the wall so your brace has something to screw into. Just a heads up, we used a rather thin piece of wood for the brace so we pre-drilled all of the holes so that the wood didn’t crack. Don’t attach the brace to the half circle shelf until you are ready to hang the shelf to avoid messing up. (If you watch the video you will see we didn’t have a stud finder so we have multiple holes in our walls. We used a nail and hammer and nailed in multiple places until we found the studs.)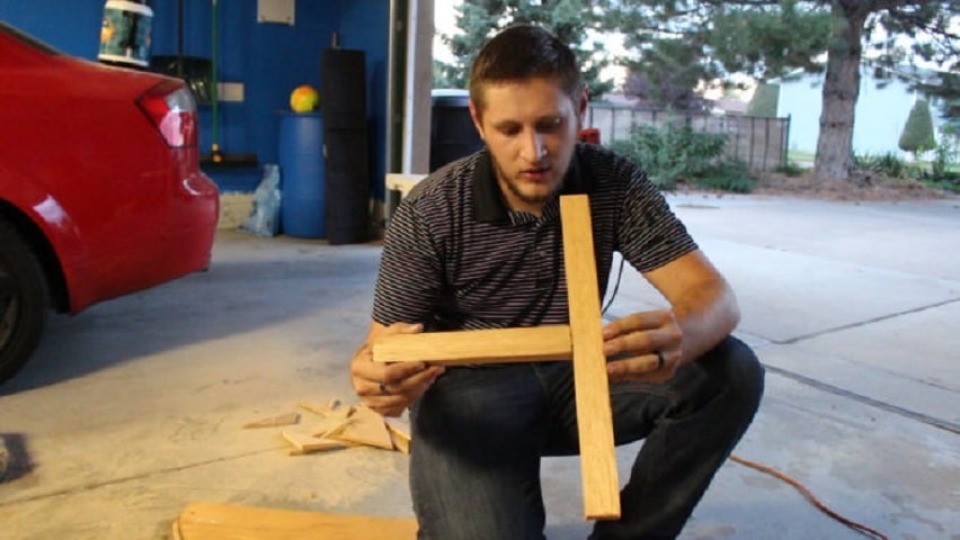
Step 4- Connect half circle to brace
After you have attached the brace to the wall you will want to remove it and nail the half circle to the brace before putting it on the wall permanently. I would recomend using something small like finishing nails. It wont take much to hold them together. This is just to help avoid the two from sliding apart.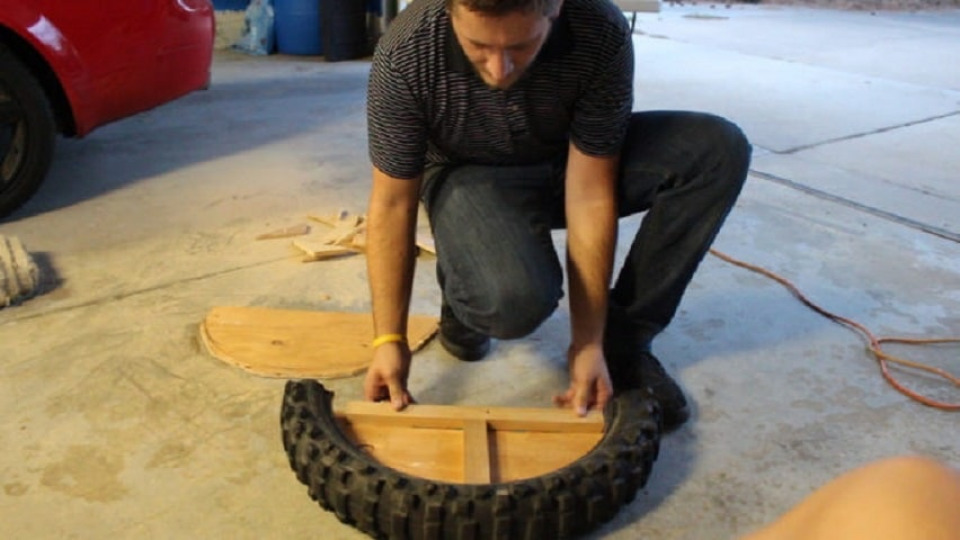
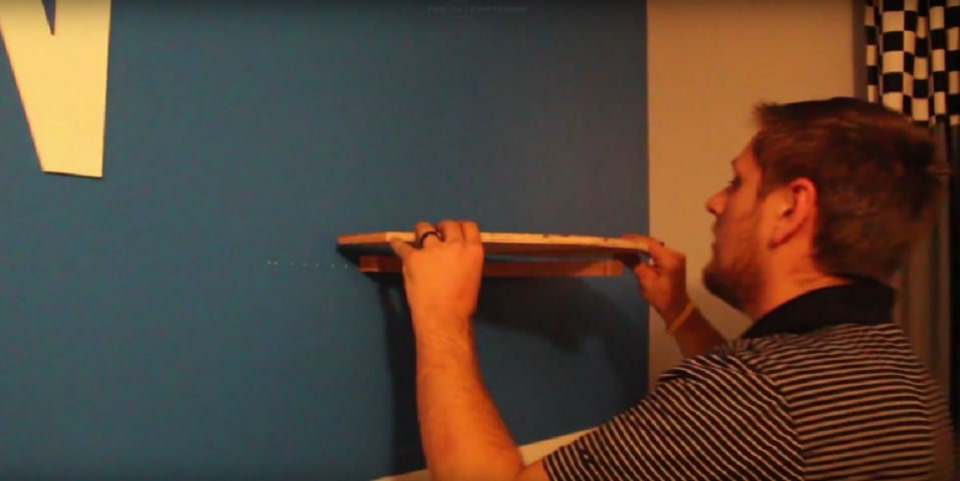
Step 5- Paint wood
I didn’t like the color of the plywood with the black tire so I spray painted it black. This just helped tie it all together. Painting it was quick and it didn’t have to look perfect because you really can’t see it that much.
Step 6- Attach Tire
Once your wood is painted you will attach it back to the wall and slide the tire on. Since it is a shelf and we put it high enough that it shouldn’t get bothered we didn’t do anything to attach the tire. It is just hanging there. If you worry that it might slide off, you can run a finish nail our two through the edge of the rubber to hold it to the wood. After that you are done! Then, you have a fun Dirt Bike Tire Shelf!
 Follow
3.5K
Follow
3.5K