Part 1 - How-To: R1 Fork Conversion
R1 Parts Required (all other parts are re-usable)
- Forks
- Upper Triple Clamp
- Lower Triple Clamp
- Front Fender with Hardware
- Left and Right Clip-Ons
Step 1
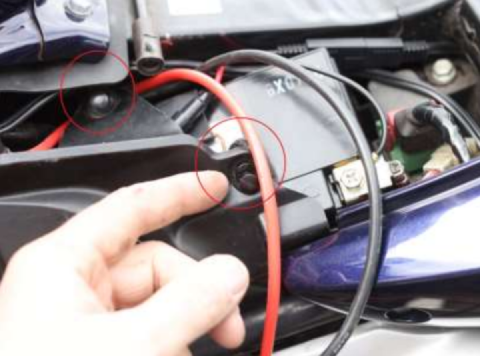
Safety first! Disconnect GROUND cable on battery
1. Remove (2) 5mm Allen bolts located at rear below the rider's seat
2. Remove (1) 10mm or Phillips bolt on Negative (-) post on Battery
3. Relocate Black Ground Wire away from battery
Step 2
Install Rear Swing Arm Stand on a level, smooth surface
Step 3
Remove Front Fender
1. Remove (2) Phillips Screws
2. Remove (2) 8mm bolts with 10mm nuts behind it
3. Remove Fender by sliding towards the FRONT
Step 4
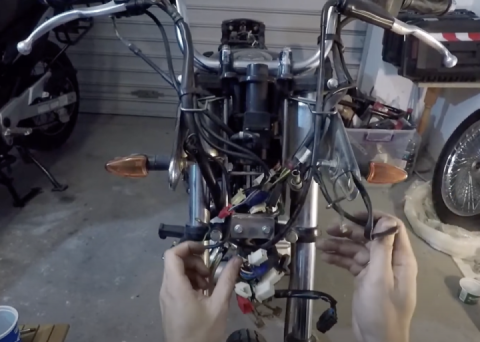
Remove Upper Fairing
1. Remove Left and Right Ram Air covers ((2)-Phillips screws each cover)
2. Remove Left and Right Mirrors ((2) 10mm nuts each)
3. Remove 10 Phillips screws retaining upper fairing assy. (6) Silver Phillips screws on the sides (3 Left, 3 Right) (4) Green Phillips screws around and behind the headlamps (2) Black plastic Phillips retainers below the Ram Air inlet (2) Black plastic Phillips retainers on inside fairing covers, near radiator
4. Pull the COMPLETE upper fairing assembly PARTIALLY away from the steering to disconnect the following:
5. Disconnect Left and Right side marker lamp connectors
6. Disconnect WHITE connector below Upper Fairing Stay
7. Disconnect Connector behind Gauges (Pull back black rubber cover to gain access) NOTE: At this time, the Ram Air Grille may fall out unless you remove it yourself by reaching it from behind the headlights, along with the rubber “coupling” that connects the two duct inlets together
8. Set aside Upper Fairing/Headlamp assembly to a safe location
9. Remove (2) 8mm bolts holding the ram air inlets to the Fairing Stay Bracket
10. Loosen (2) Phillips screws that secure front section of Air Duct to rear section (hose-clamp type connection)
11. Remove Air Duct assembly and put away in a safe place
Step 5
Remove Upper Fairing Stay Bracket
1. Remove (2) 12mm bolts attaching bracket to the frame
2. Set aside Upper Fairing Stay Bracket with Gauges
Step 6
(Optional - really no need, but ensures no damage) Remove Mid and Lower Fairing Panels
Step 7
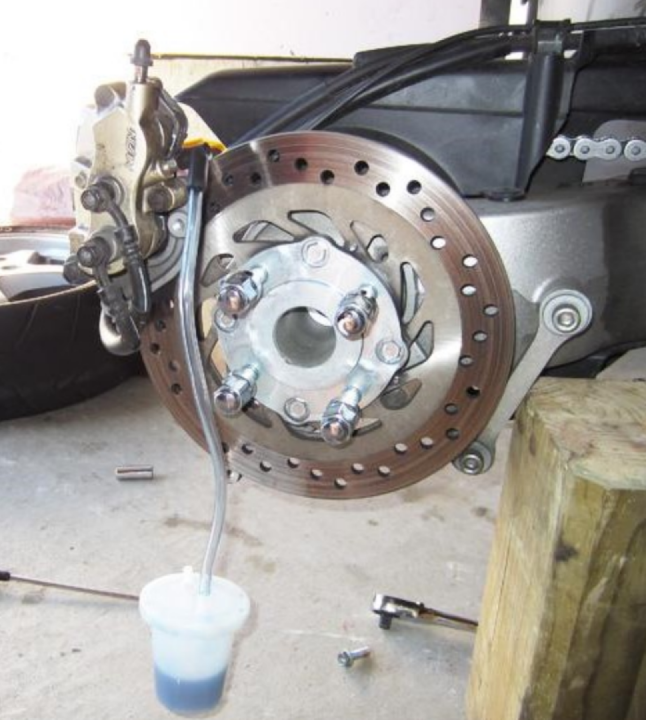
Remove COMPLETE Front Brake Assembly as ONE UNIT
1. Remove 8mm bolt on each fork leg retaining brake hose holder
2. Set holder's aside
3. Remove (2) 12mm bolts attaching Brake Caliper on each fork leg
4. Slide each brake caliper off the brake disc, and let it momentarily hang
5. Using a pair of wire cutters, snip the thinnest piece of the Lower Triple Clamp COVER to allow the brake hose to be removed on each side
6. Using a pair of standard pliers, slightly open the wire brake hose holder on the Lower Triple Clamp and slide the brake hose out
7. Remove Tie-strap holding brake hoses to upper Right fork leg
8. Disconnect Horn Wires, remove tie-strap holding horn wires to Lower Triple Clamp
9. Remove (2) 5mm Allen bolts holding Dust Cover/Brake Line Holder Bracket
10. Pull Bracket away enough to reach (2) 10mm bolts securing Brake Line Holder to Bracket
11. Disconnect Brake Light Switch Wires from underneath Brake Lever
12. Remove (1) 8mm bolt retaining Master Cylinder Reservoir to Upper Triple Clamp
13. Remove (1) 8mm bolt attaching Master Cylinder Reservoir to Clutch Cable Holder Bracket
14. Supporting the Master Cylinder assembly, remove (2) 8mm bolts retaining the master cylinder clamp on the right side Clip-On
15. Set aside the complete front brake assy. ensuring the master cylinder is hanging ABOVE the brake calipers
NOTE: DO NOT squeeze the brake lever once the brake calipers have been removed. You can also place a thin object between both sets of pads to keep the caliper pistons from coming out
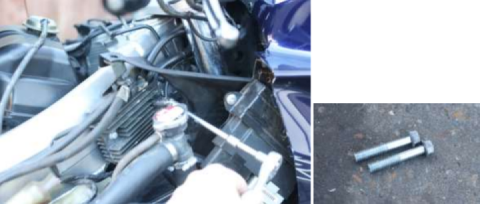
Step 8
Remove Front Wheel
1. Loosen (1) 6mm Allen Axle pinch bolt on RIGHT side fork leg
2. Loosen (NOT remove) front wheel axle
NOTE: Be careful not to tip motorcycle over!
3. Using a standard scissor jack (Easily found in many foreign cars), raise the motorcycle in front by placing the jack below the header exhaust pipes. There is spot with a sheet of flat metal welded to it, raise it there.
NOTE 1: Make sure motorcycle remains steady on rear stand as you raise the front!!! NOTE 2: Using a measuring tape, measure the distance between the BOTTOM of the steering neck of the frame (just above the lower triple clamp) and the CENTER of the wheel axle. Save this measurement for future reference when re-installing the R1 forks. 4. NOW remove the front axle
5. Remove Front wheel and set aside in a safe place
 Follow
2.5K
Follow
2.5K