Part 1 - VFR800 VTEC (6th Gen) Brake Bleeding Procedure
The Linked-brake system of the VTEC is a nightmare to bleed unless you know what you are doing, the service manual is incomplete and doesn’t tell you all you need and so this guide should help to fill the gaps. It is broken into five parts these parts are as follows;
Part 1: Theory
Part 2: Disassembly and Preparation
Part 3: Procedure
Part 4: Assembly
Part 5: Clutch
Part 1: Theory
The way the 6th generation LINKED BRAKING SYSTEM works is; when the front lever is applied, only five out of the six (three pistons in each left/right calliper) calliper pistons actuate as well as the centre piston in the rear calliper leaving the left calliper centre piston untouched.
When the rear pedal lever is applied; only two out of the three rear calliper pistons actuate as well as the left front calliper centre piston. The LINKED BRAKING SYSTEM only works when the motorcycle is moving however, you can test this by propping your bike on the centre stand, rotating the rear wheel and applying the front brake; the rear wheel will not stop spinning.
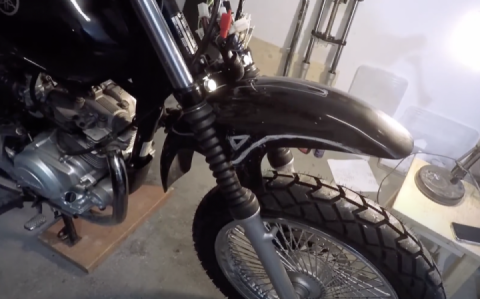
The way it works is by force. The SECOND MASTER CYLINDER is mounted above the left calliper that's attached to the fork and with the motorcycle moving, the rider will apply the front brake which squeezes the pads on the rotor and that drag pivots the left front calliper up which actuates the SECOND MASTER CYLINDER and brake fluid gets pushed through to the LEFT Proportional Control Valve and then to the rear calliper centre piston. The rear doesn't work in the same way because there's a brake line that goes to the front left calliper that actuates that one centre piston by alone with the application of the rear pedal.
Part 2: Disassembly and Preparation
1. Ensure bike is on level ground and on Centre Stand.
2. Rotate the handle bar all the way to the left so the LEFT MASTER CYLINDER is level.
3. Remove both screws and remove all the old fluid inside the LEFT MASTER CYLINDER. Once the old fluid is out, fill it up with fresh new fluid. Make sure you squeeze the front lever a few times just in case you got any air bubbles when removing the old fluid.
4. Using a 6mm Allen key, loosen, but do not remove the left front calliper bolts.
5. Remove the seat and do the same procedure you did for the LEFT MASTER CYLINDER to the RIGHT MASTER CYLINDER. Don't forget to press the pedal lever a few times to remove any air bubbles.
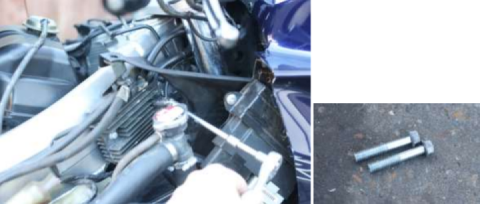
6. Remove the rear wheel.
7. Remove the two bolts that hold the rear calliper on to the bracket. The inside one is tricky and I needed to use a long 12mm socket to reach it.
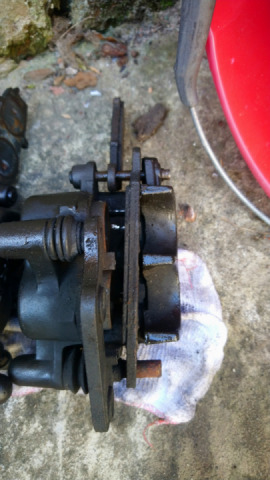
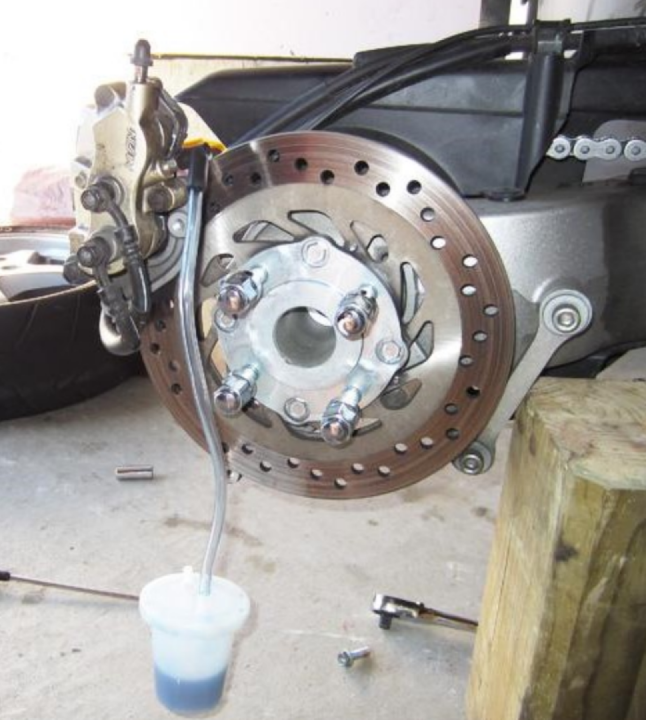
8. Once the rear calliper is removed, mount it at the 10 o'clock position on the brake disc. The reason for this is so the inner/centre bleed screw is facing up, not parallel to the ground.
Part 3: Procedure
The procedure and order we're going to follow is the same one listed in the FACTORY SERVICE MANUAL, but with more pictures and explanations. Sections C. and D. are the most difficult. You will need a helper as well.
USING FRONT MASTER CYLINDER LEVER FOR SECTIONS A. AND B.
A. Left Front Calliper, Upper/Outer Bleed nipple 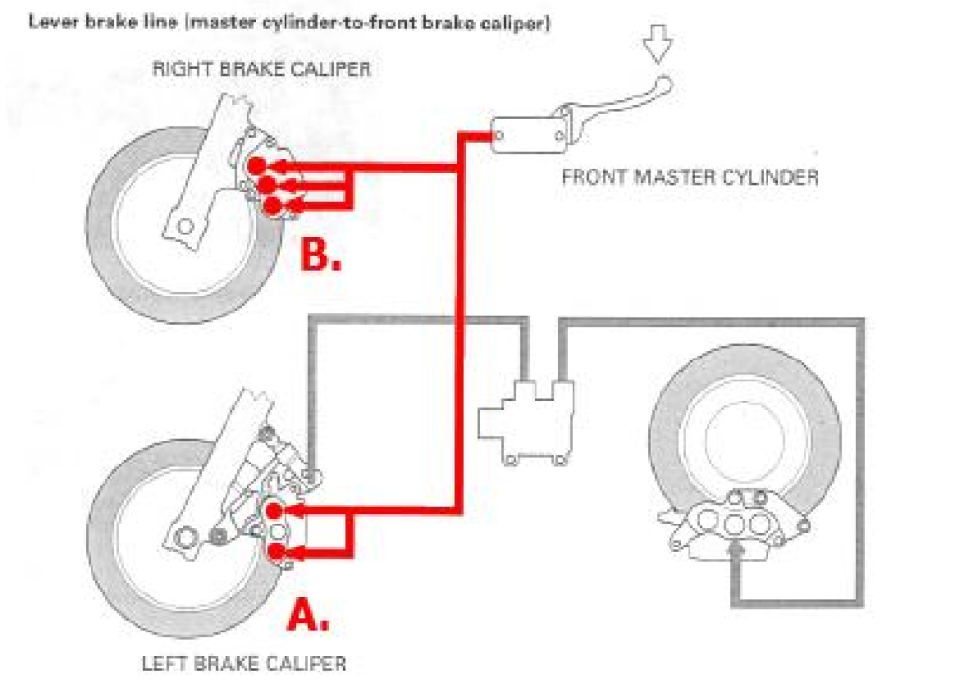
A1. Open the Upper/Outer bleed nipple on the front left calliper very slightly, about a 1/4 turn, and pump the front lever until new fluid comes out.
A2. Close the bleed nipple.
A3. Pressurise the system; with the bleed nipple closed, pump the front brake lever five times and hold, this is easier with a helper. While holding, gently unscrew the bleed nipple until fluid comes out and before the lever reaches its maximum travel, tighten the bleed screw.
A4. Top up the fluid level.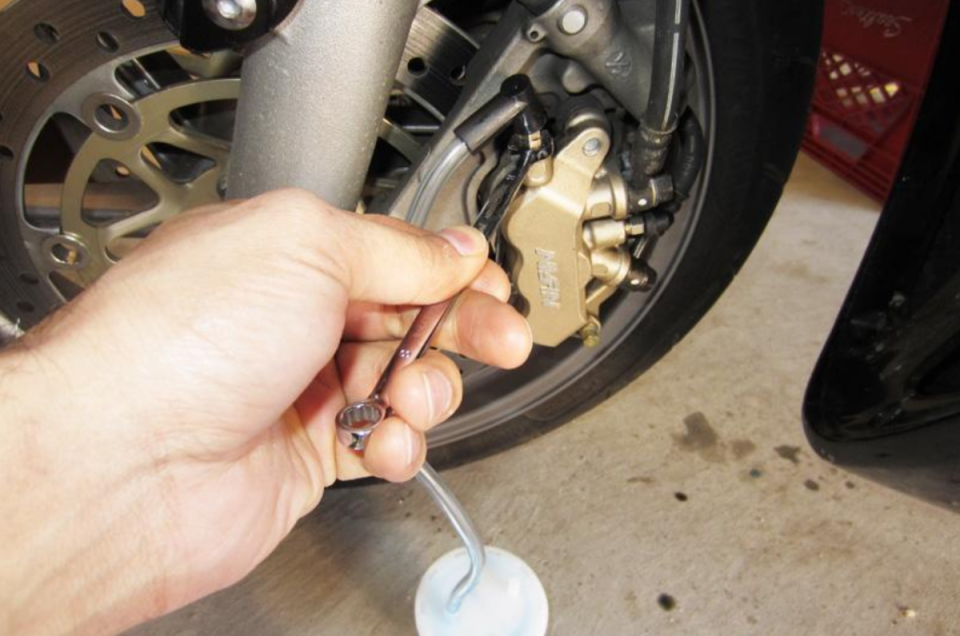
B. Right Front Calliper, Single Bleed Nipple
B1. Open the Upper/Outer bleed nipple on the front right calliper very slightly, about a 1/4 turn, and pump the front lever until new fluid comes out.
B2. Close the bleed nipple.
B3. Pressurise the system; with the bleed nipple closed, pump the front brake lever five times and hold, this is easier with a helper. While holding, gently unscrew the bleed nipple until fluid comes out and before the lever reaches its maximum travel, tighten the bleed screw.
B4. Top up the fluid level.
USING REAR MASTER CYLINDER PEDAL FOR C. TO G.
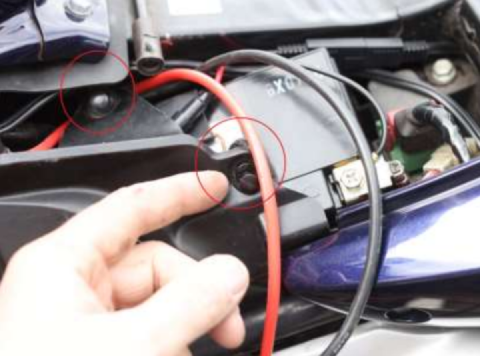
C. Left side Proportional Control Valve (Battery side), Single Bleed Nipple Actuated via SECOND MASTER CYLINDER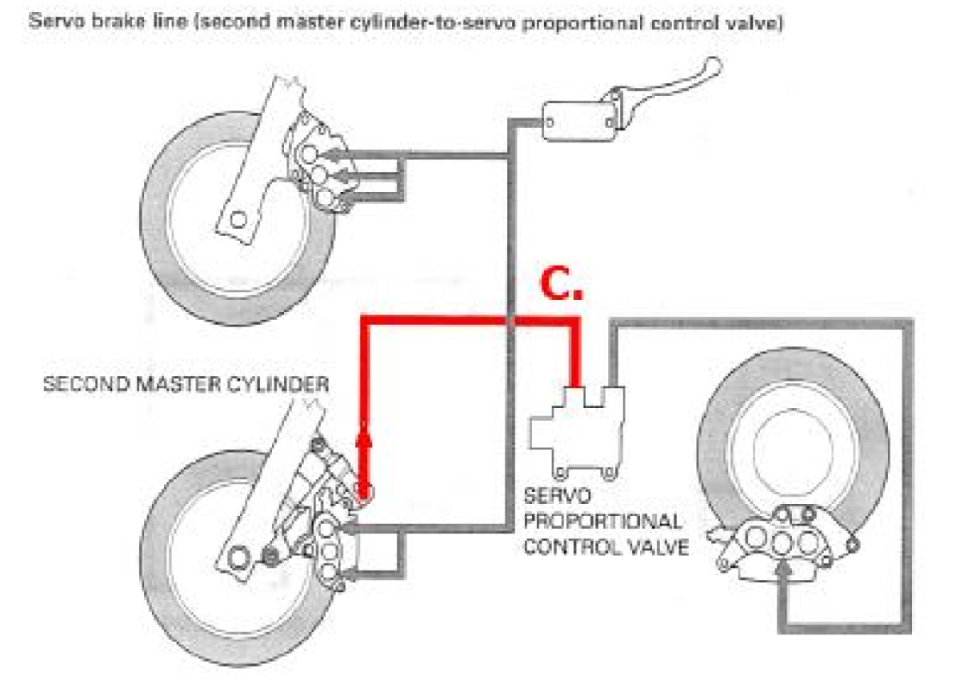
C1. Remove the bolts holding the left front calliper on. 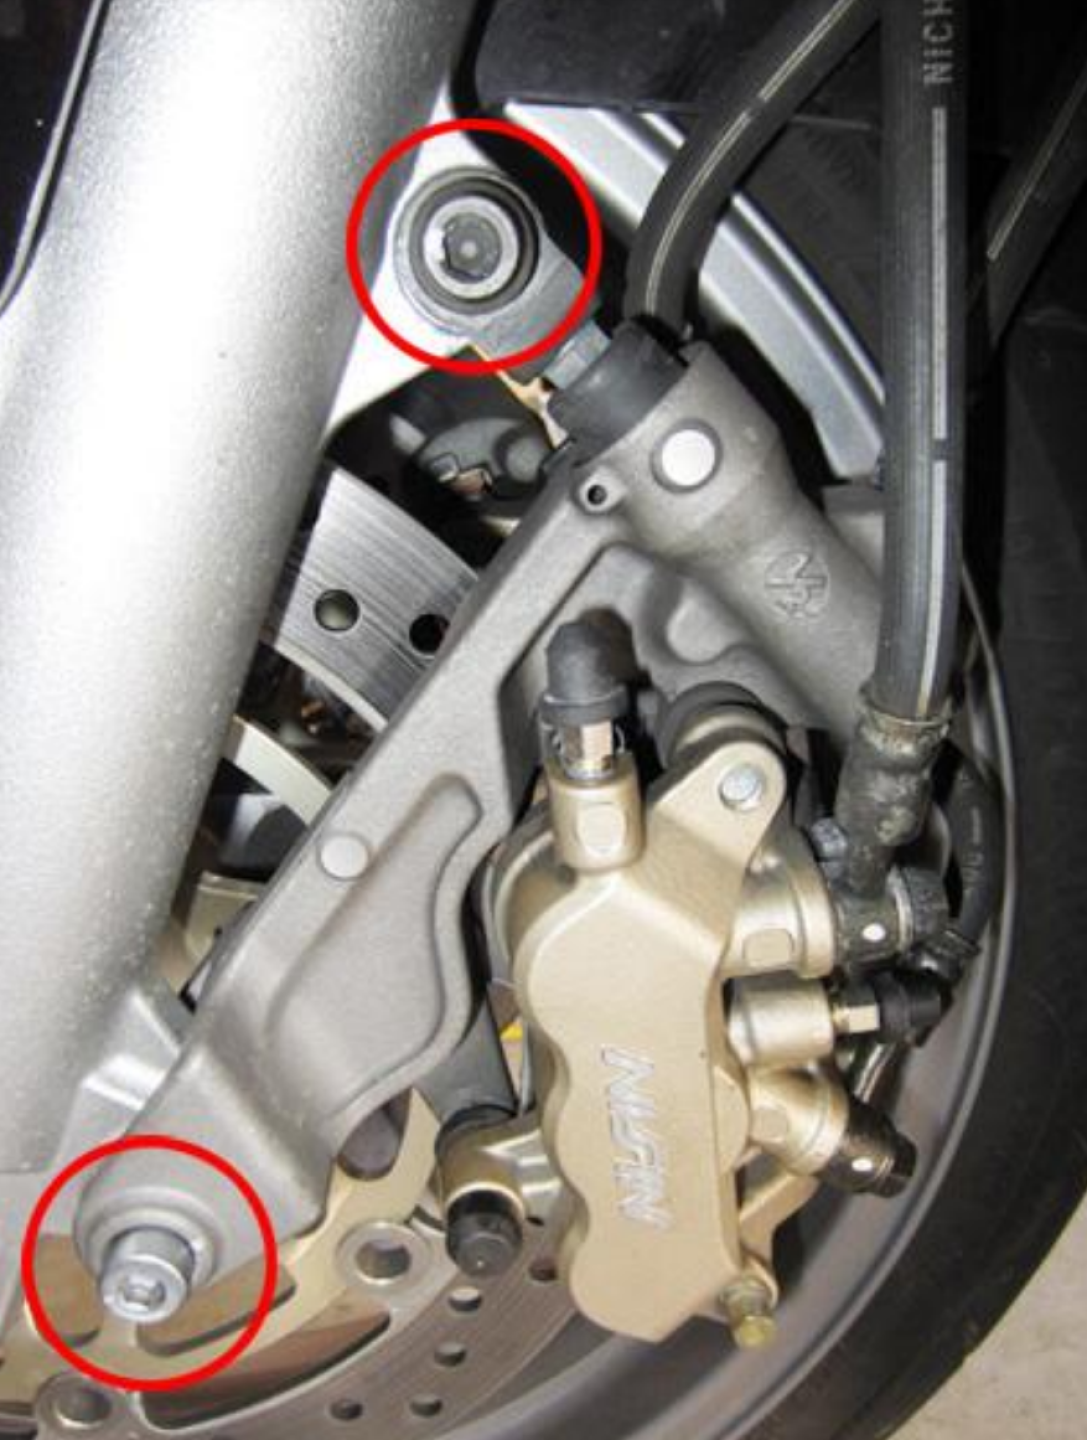
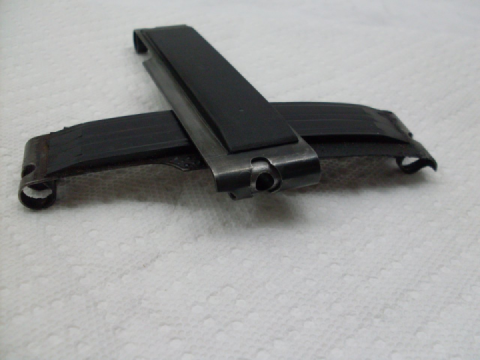
C2. Ensure the Pads are wedged open. I used an aluminium L-bracket I had lying around to wedge between the pads so they don't close.
C3. Tilt the calliper 15° from the ground so the inner/centre bleed screw is facing up. 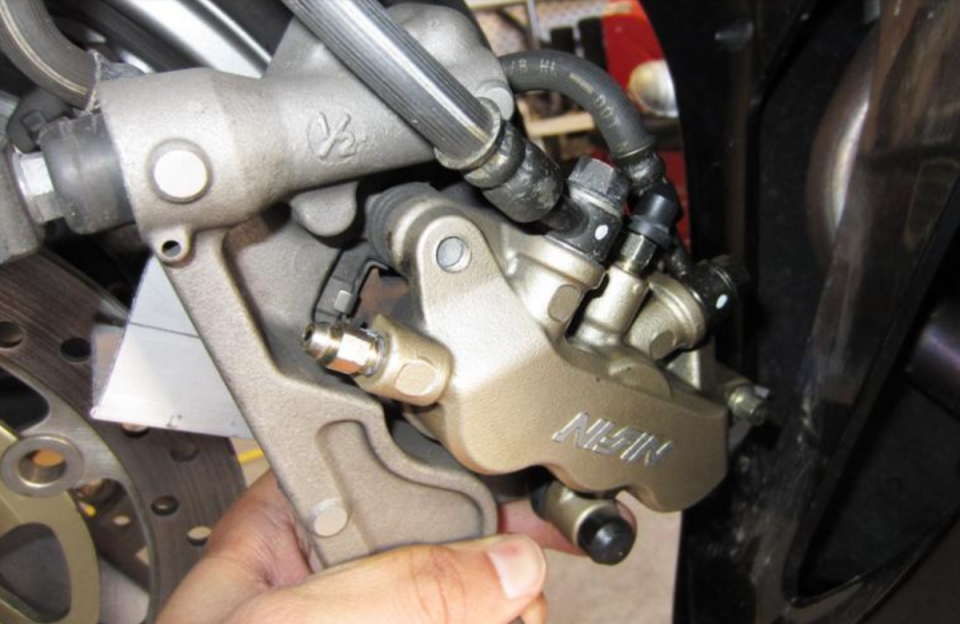
C4. Press the RIGHT MASTER CYLINDER (rear brake) pedal down, the SECOND MASTER CYLINDER piston will get pushed out filling it with fresh fluid.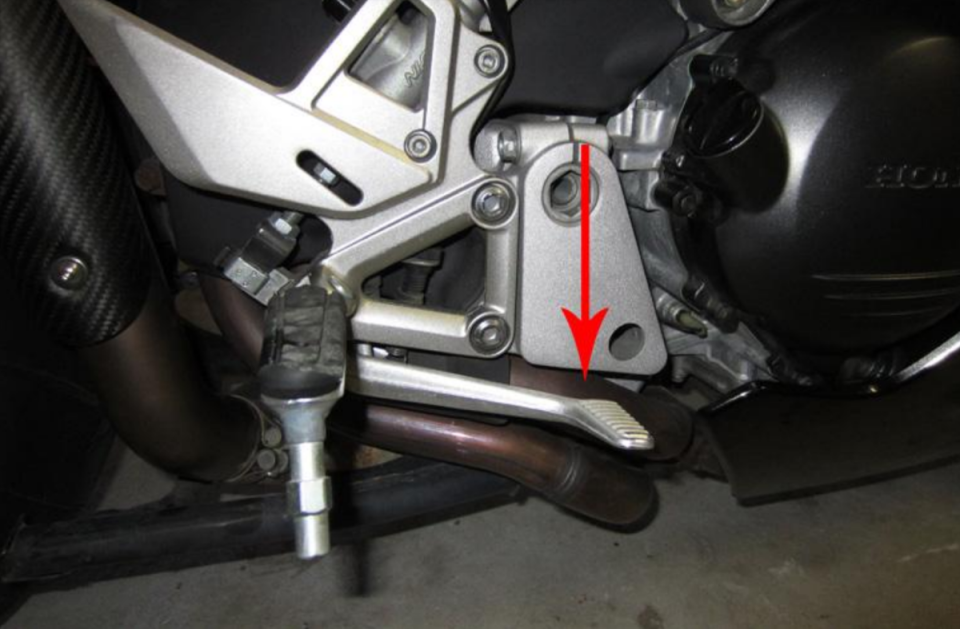

C5. Release the pedal and manually actuate the SECOND MASTER CYLINDER by pressing it in to the calliper, fluid will get pushed through to the LEFT Proportional Control Valve bleed nipple.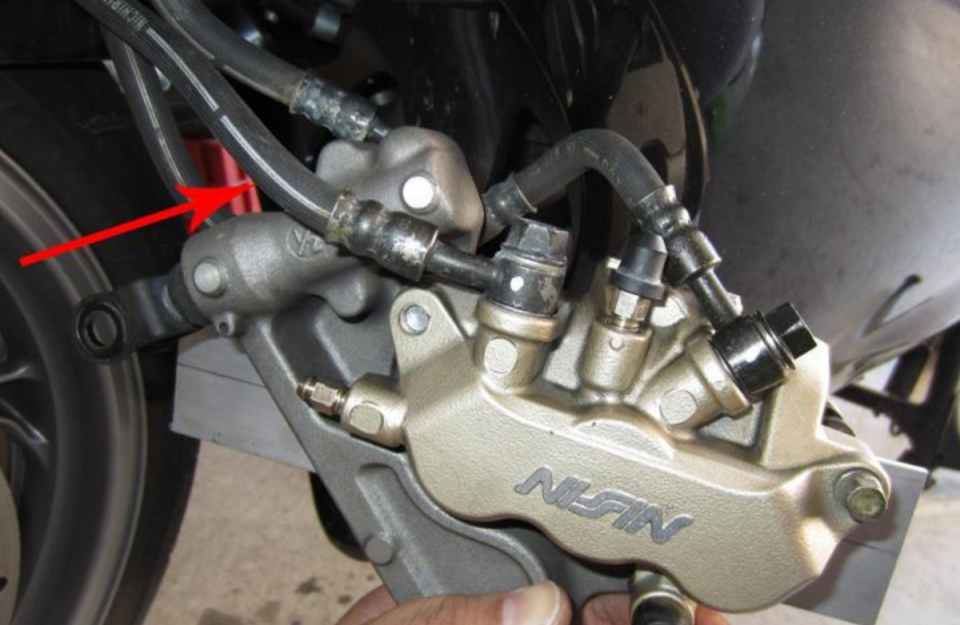
C6. Do not release the SECOND MASTER CYLINDER from this point. Ask a helper to press the pedal again which will forcefully push the SECOND MASTER CYLINDER out and then once your helper releases the pedal, you will manually push the SECOND MASTER CYLINDER in again watching for new fluid.
C7. Close the LEFT Proportional Control Valve bleed nipple.
C8. Pressurise: Pump the rear brake pedal five times and release.
C9. Loosen the LEFT Proportional Control Valve bleed nipple and manually actuated the SECOND MASTER CYLINDER gently half way. Tighten the bleed nipple.
Note: DO NOT manually operate the SECOND MASTER CYLINDER more than once per operation of the rear brake pedal. Continuously pushing in the SECOND MASTER CYLINDER numerous times will not bleed the SECOND MASTER CYLINDER to LEFT PCV brake line because there is no reservoir at the SECOND MASTER CYLINDER. You will push whatever fluid is in the line and it will become empty with air.
One manual push of the SECOND MASTER CYLINDER followed by one rear pedal actuation by your helper is all that is required each time to pump the new fluid to the PCV.
D. Rear Calliper, Inner/Centre Bleed Nipple Actuated via SECOND MASTER CYLINDER
This procedure is the exact same as the above. The only difference is, you're bypassing the LEFT Proportional Control Valve and going all the way to the rear calliper inner/centre bleed nipple. Pressurise the system the same way Section C.
D1. Press the RIGHT MASTER CYLINDER (rear brake) pedal down, the SECOND MASTER CYLINDER piston will get pushed out.

D2. Release the pedal and manually actuate the SECOND MASTER CYLINDER by pressing it in to the calliper, fluid will get pushed through to the rear calliper inner/centre bleed nipple.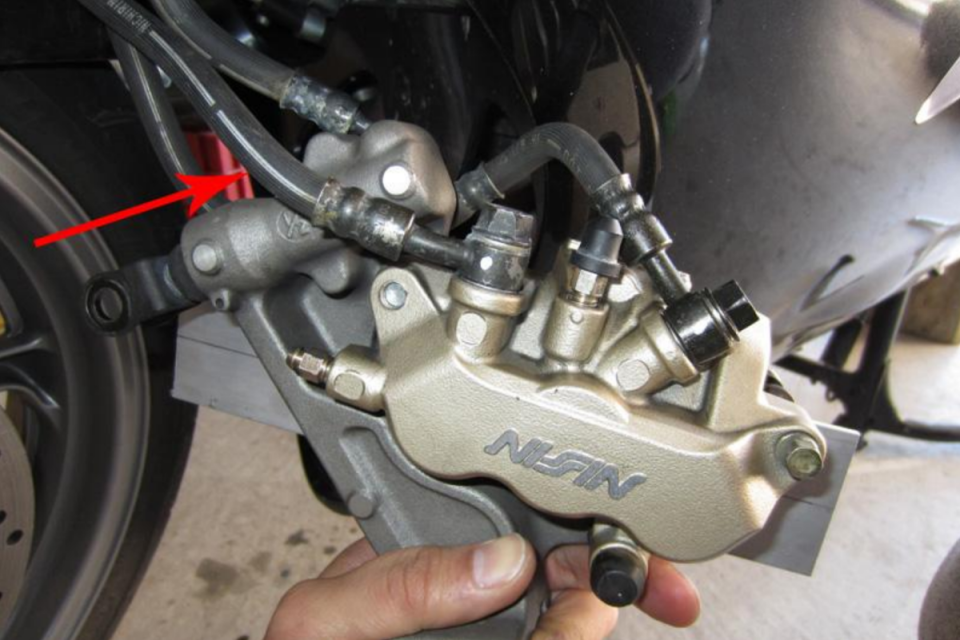
D3. Do not release the SECOND MASTER CYLINDER from this point. Ask a helper to press the pedal again which will forcefully push the SECOND MASTER CYLINDER out and then once your helper releases the pedal, you will manually push the SECOND MASTER CYLINDER in again watching for new fluid.
D4. Close the Rear Calliper inner/centre bleed nipple.
D5. Pressurise: Pump the rear brake pedal five times and release.
D6. Loosen the Rear Calliper inner/centre bleed nipple and manually actuated the SECOND MASTER CYLINDER gently half way. Tighten the bleed nipple.
Expect part two
 Follow
5.7K
Follow
5.7K