Gary Nixon Kawasaki H2 race bike replica 300 Ninja project.
Once the plan was hatched I started looking for a donor bike and found a 2014 300 Ninja with ABS in short order.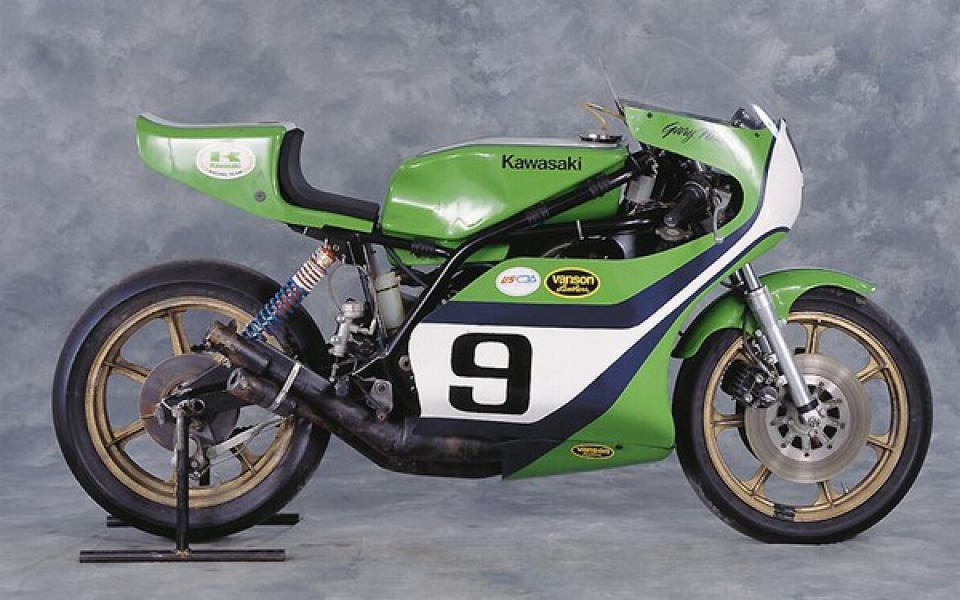
The poor little bike had been badly crashed cosmetically with only 54 miles on it. Since the rear subframe was bent no one wanted to buy it. I knew that the rear subframe will require some surgery to fit the skinny H2 tail so I had no such reservations. When it arrived I stripped off all the bodywork and found, after careful measurement, that everything was straight, even the forks. The subframe however was badly twisted and since it was triangulated there was very little chance of straightening it out as is. So I cut off the subframe at the point just before the triangle ended so I could manipulate the individual tubes, got it all straight and then welded it back together again, sans some of the brackets I knew I will not use. Below is a before and after picture showing how much modification was required. Stock subframe.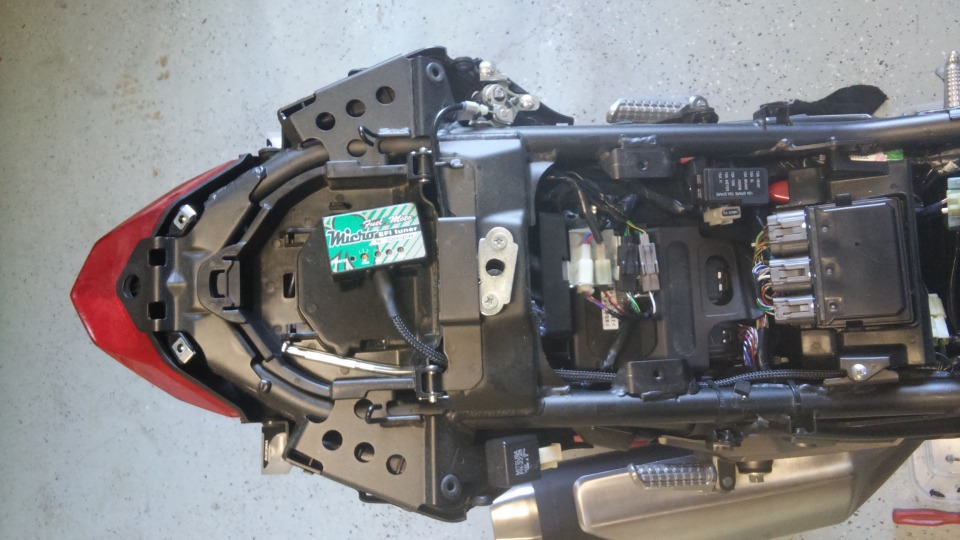
Modified subframe with additional mounts for H2 seat and LED integrated tail lights.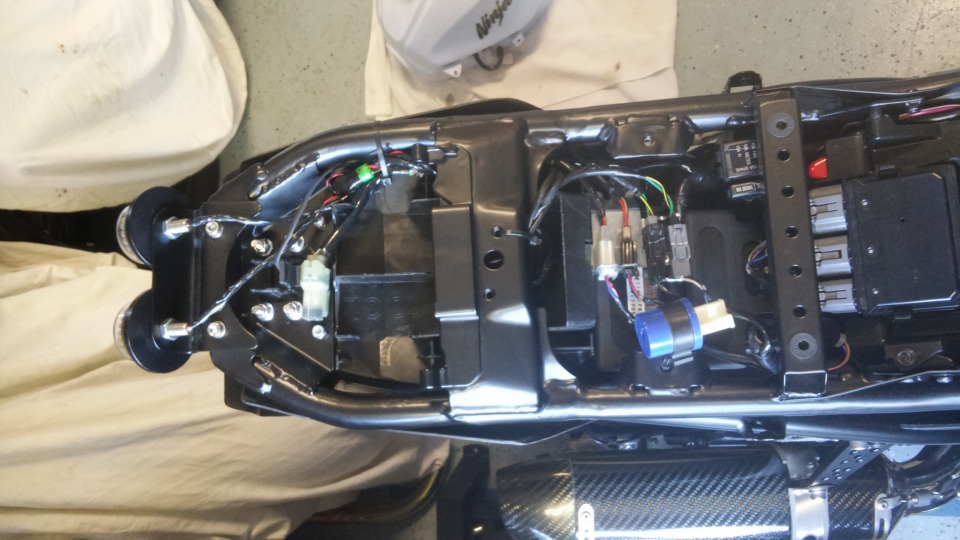
The gas tank on the 300 Ninja has some plastic skirts that blend into the fairing. When removed the sides of the tank were exposed and ugly to look at. So I had to either modify the tank or make a new one. I went with the path of least resistance on this and modified the tank by adding some “skirts” on the side and around the back to essentially widen the sides. The picture below shows what I did.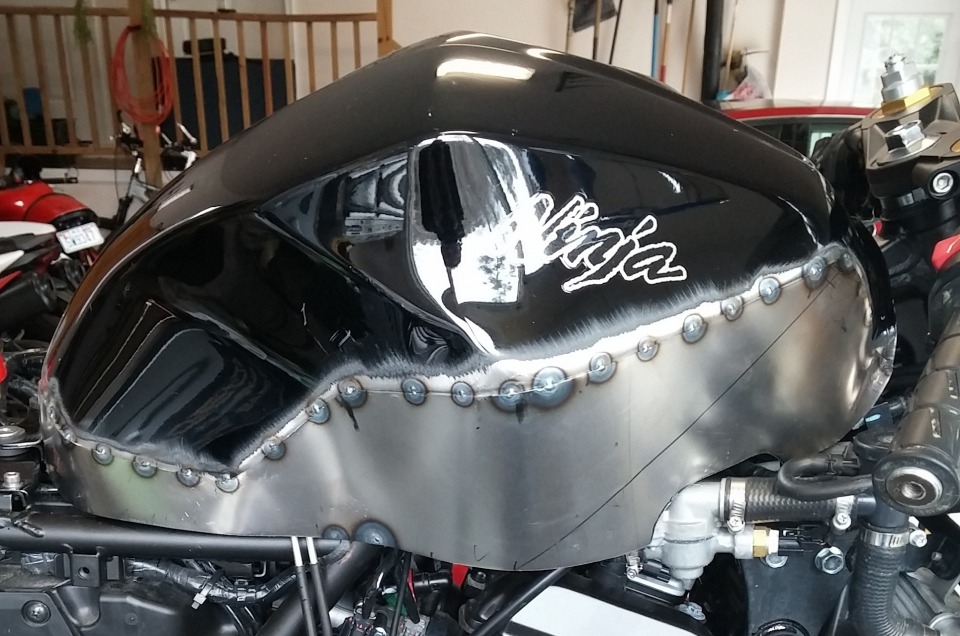
The shape was not exactly what I was looking for, but with the area blacked out to the right of the line drawn on the side of the tank as shown in the picture, and with some clever paint design at the top of the tank it can be made to look close to right, so I went with this. I may end up making a different tank later, depending on how it turns out.
So next up was the fairing. After much research and many measurements made with considerable help from the friendly and helpful guys at Airtech-Streamlining I figured out that a 250 Yamaha race bike had dimensions close to what I was looking for and that it had enough material on the sides of the fairing to cut the shapes I needed. After a few weeks of waiting the fairing and H1 replica seat arrived and I got to work. Below is the first attempt to fit the fairing, not bad but not exactly what I was looking for. You will notice the fairing comes too far back and the shape is far off of what the Gary Nixon bike looked like.
So after I spent a significant time trimming and refitting the fairing, just cutting off enough at a time not to destroy the whole thing I finally ended up with a fairing that fit the profile I wanted. This is what it looked like after trimming and cutting.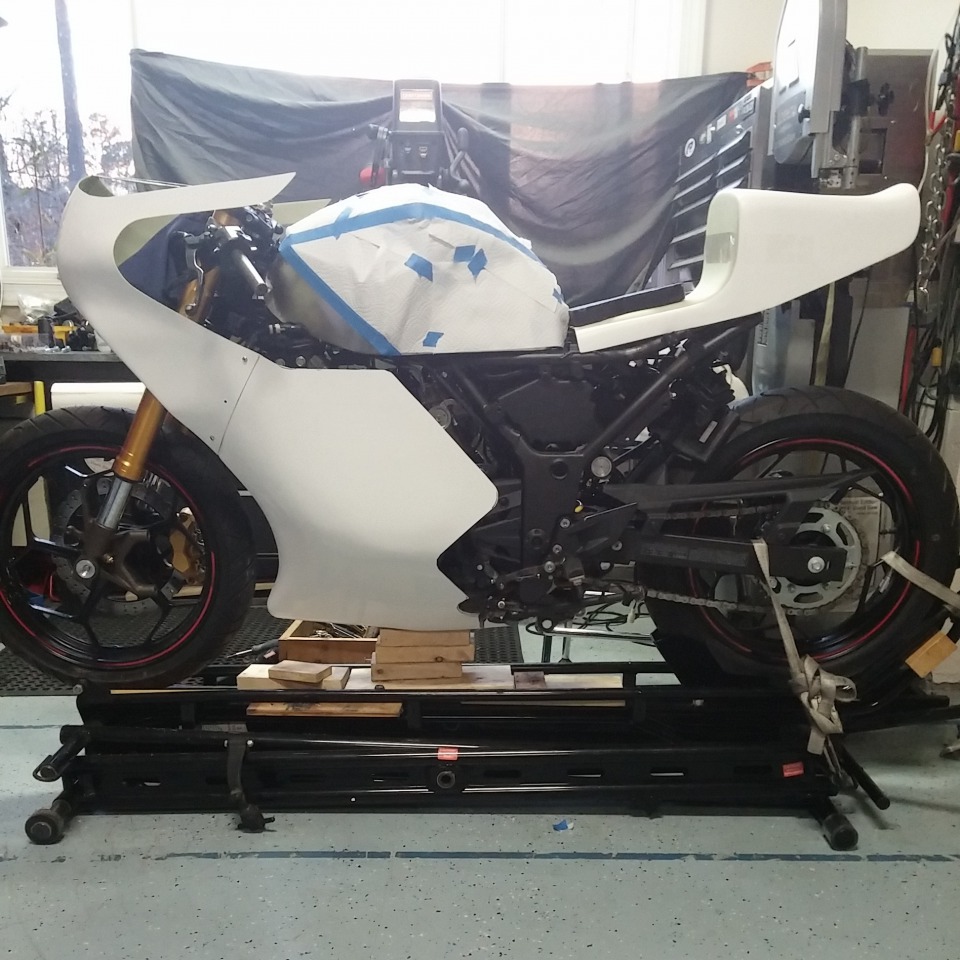
The shape now looked good. Don’t be fooled by the picture though it did not fit right yet. I had to cut the bottom in half and added some sections in to make it clear the Yoshimura exhaust. The stock header would never have fit since the catalytic converter is too large. So next up were to make the brackets to keep the fairing on the bike. There were a lot of potential mounting points but I decided to go with 5 on each side. All five would also bolt to the frame or main structure to make it rigid. Additionally I would have to add material to the fairing on the edges to provide more rigidity and also to give it a more factory finish.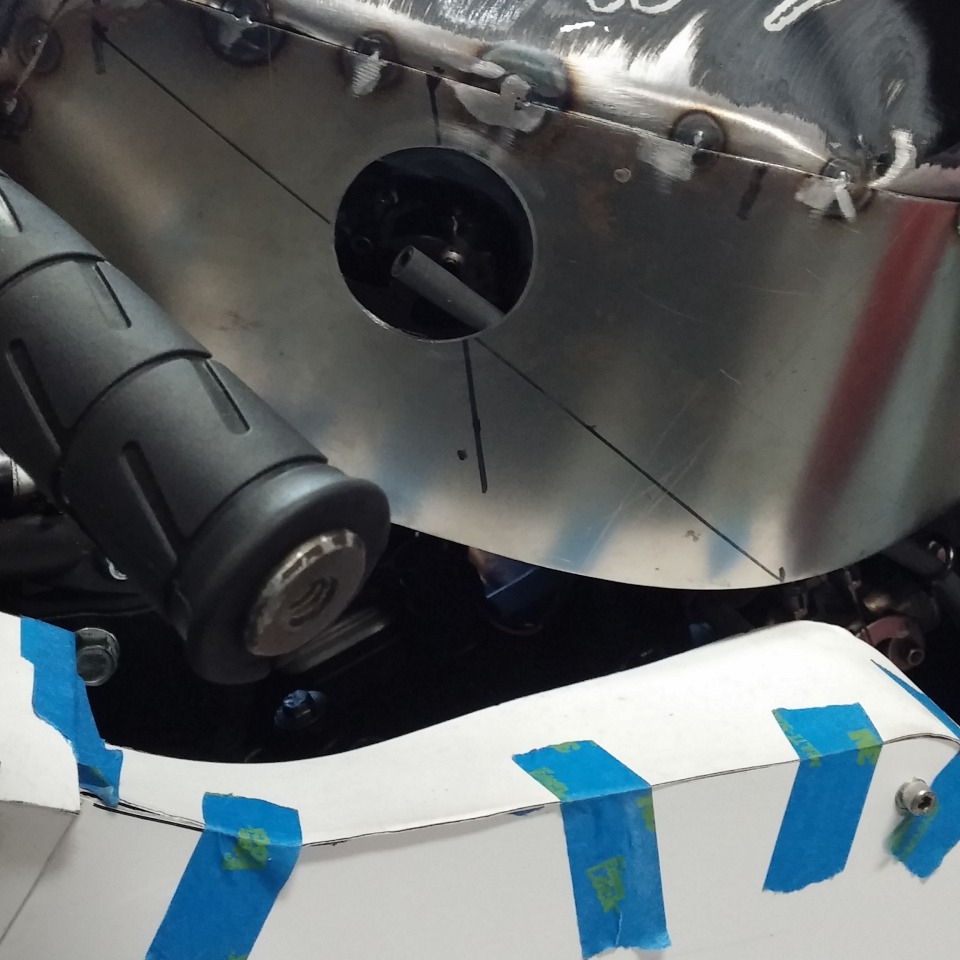
Above you can see that I used cardboard to make the templates. I later replicated this in stiffer plastic material that I could lay fiberglass on. The plastic is also non stick so did not require any mold release. Also note the hole cut into the tank skirt to gain access to the overflow pipes.
Here is the fairing with the plastic sections bolted on using about 40 different brackets and screws. Now I was ready to lay on some fiberglass on the inside of the plastic. Below is the top part of the fairing which also required this to provide extra stiffness. I will probably also have to add a fairing bracket coming off the top triple clamp bolt to make this stable.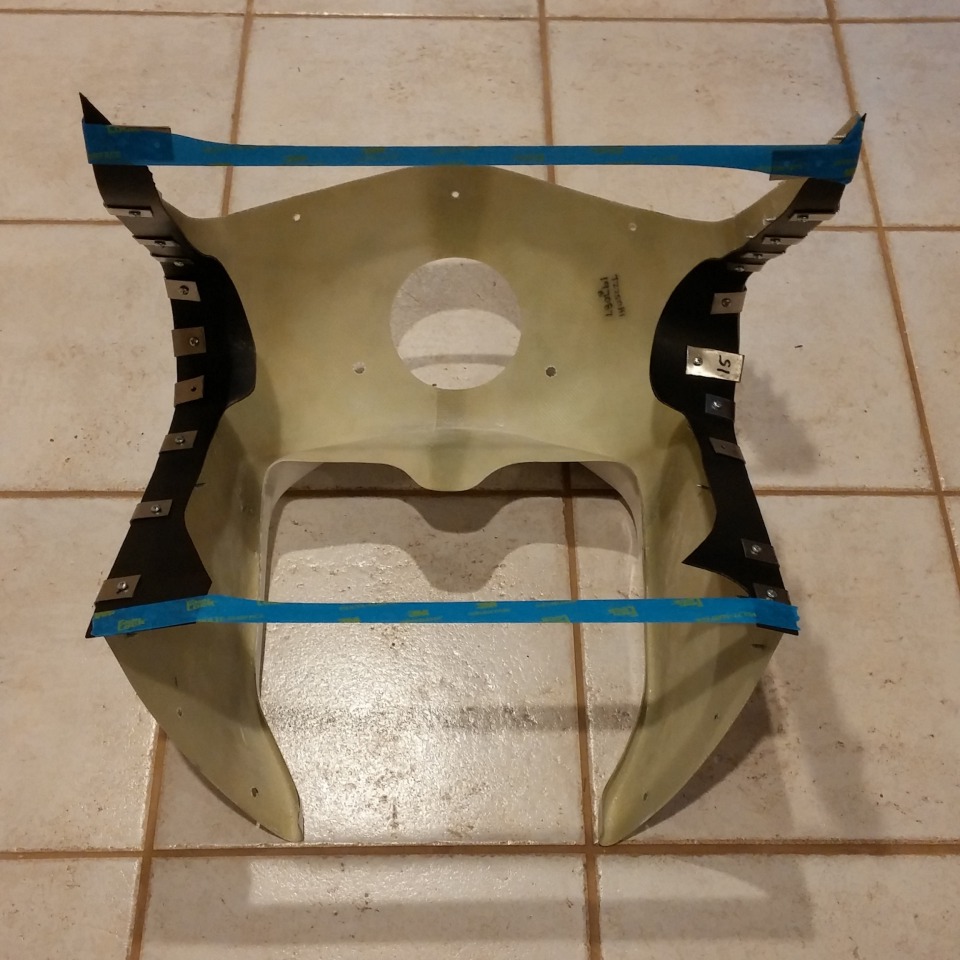
Here is the lower fairing after I removed the plastic and before trimming.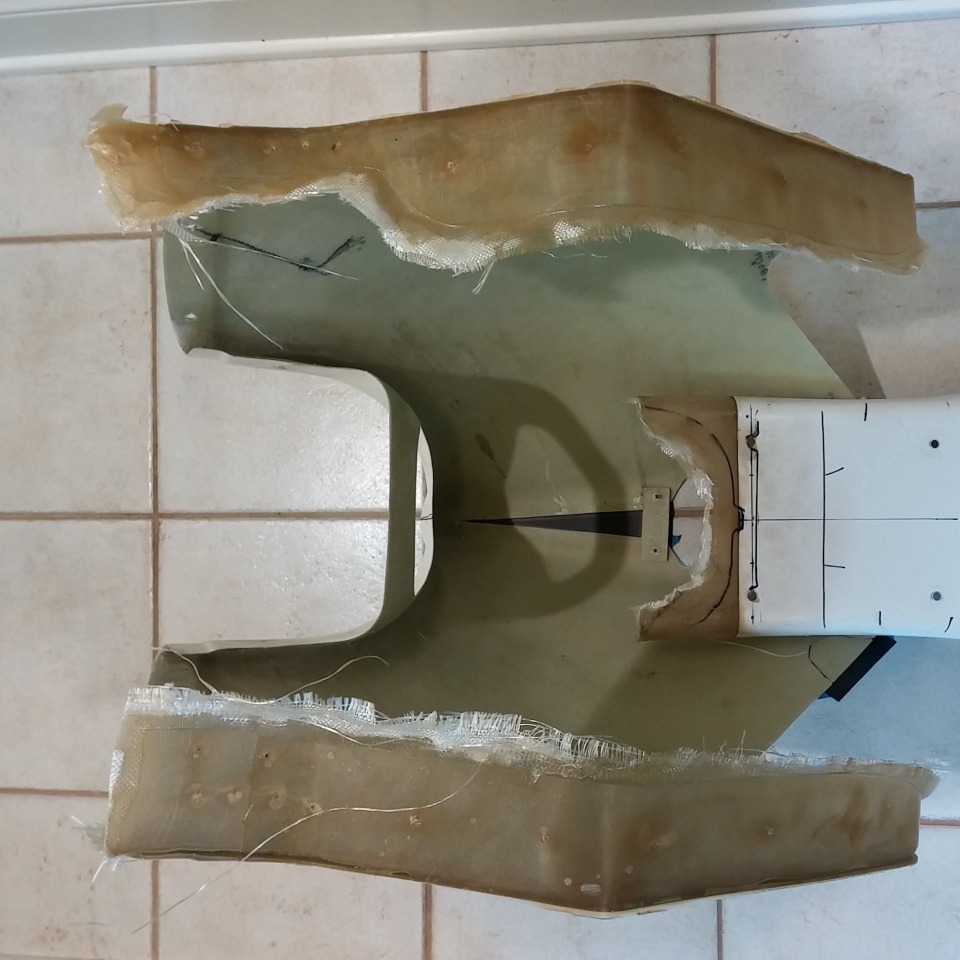
And below is the fairing top and lower after trimming off the excess material left over from adding the fiberglass. It is still full of holes at this point from the screws I used to hold the plastic on, but that will be filled later when we get to paint.
Now that I had the fairing all figured out it was time to move onto the seat unit. It also required some addition of material in the front where I wanted it to wrap around the tank for that factory finish I like so much.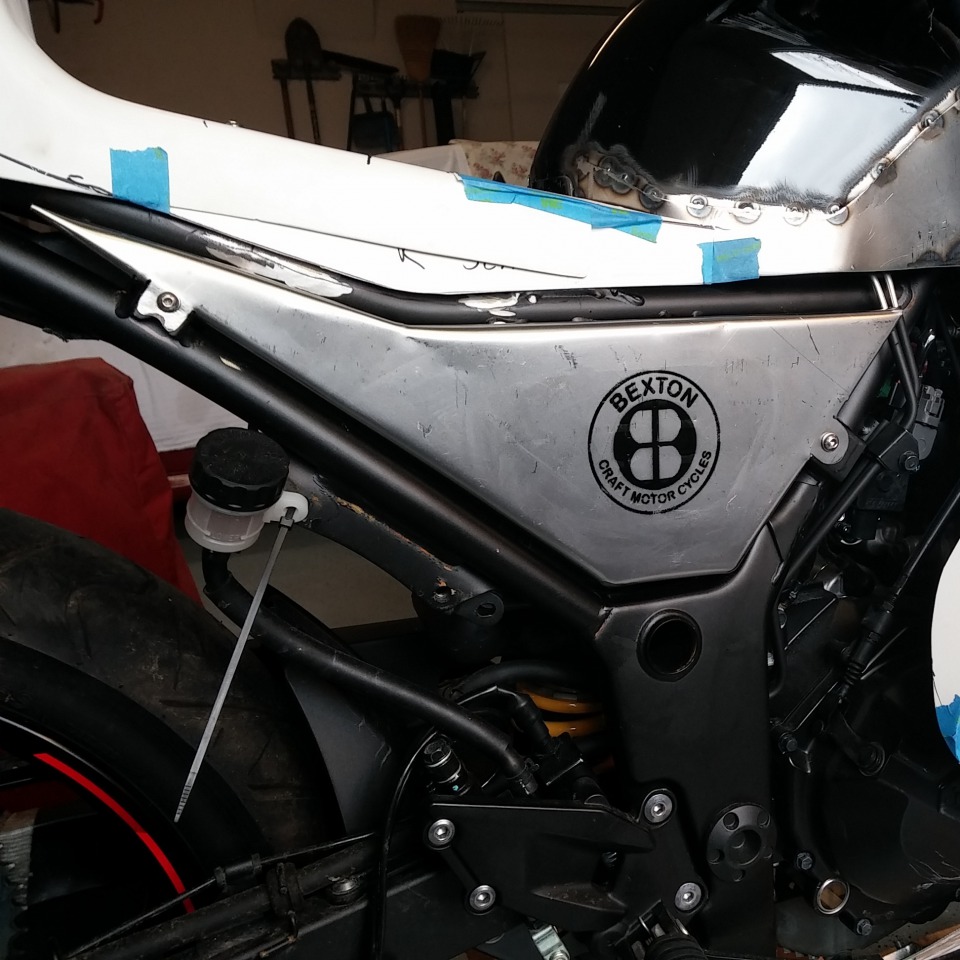
Also note in the picture above I made some side covers out of 18 gauge steel plate to cover the sides. This was probably overkill but I wanted this to look absolutely right. Note the Bexton logo. This is my official brand I have created to establish a business later on that will specialize in small capacity motorcycles. However that is a few years out at the moment. Below is a picture of the rear of the seat with the holes cut for the tail lights. I am using LED lights with integrated brake and turn signal functions.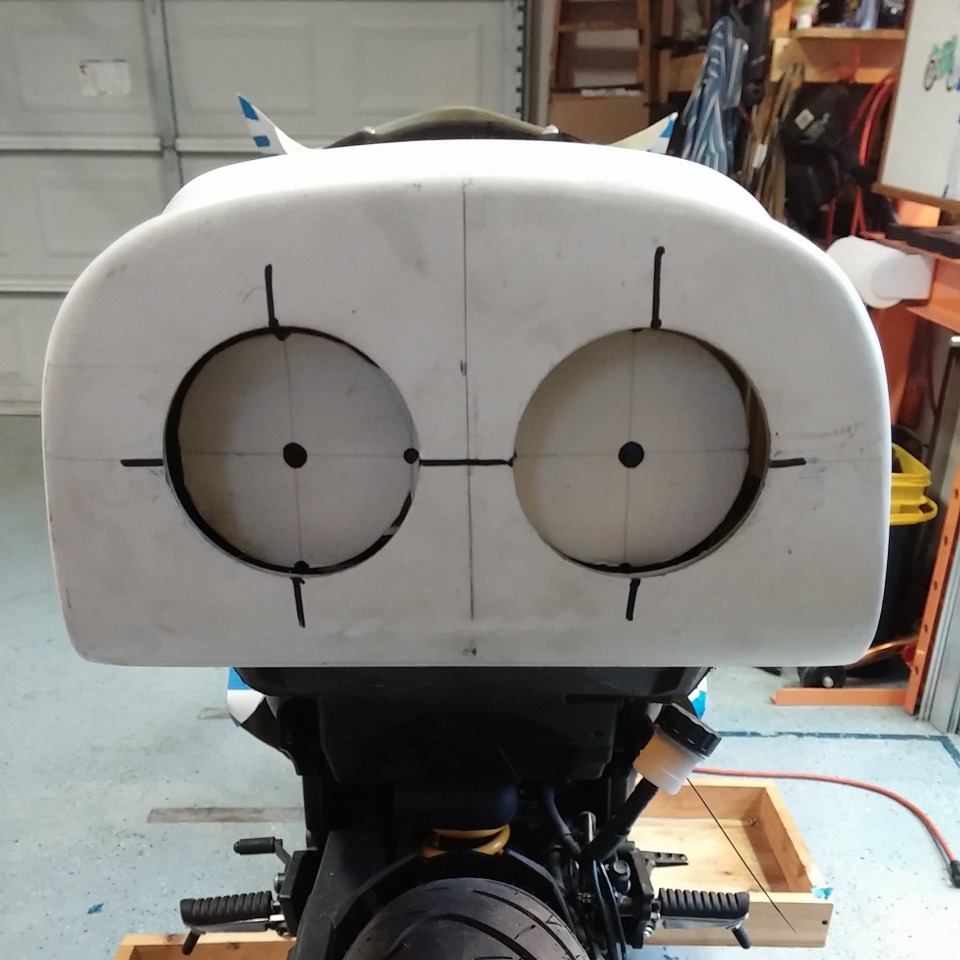
Next up is the headlight as shown in the picture below. I wanted the fairings to be removable without having to remove any pf the lights of other fittings. Essentially you could take all the fairings off and still legally ride it around.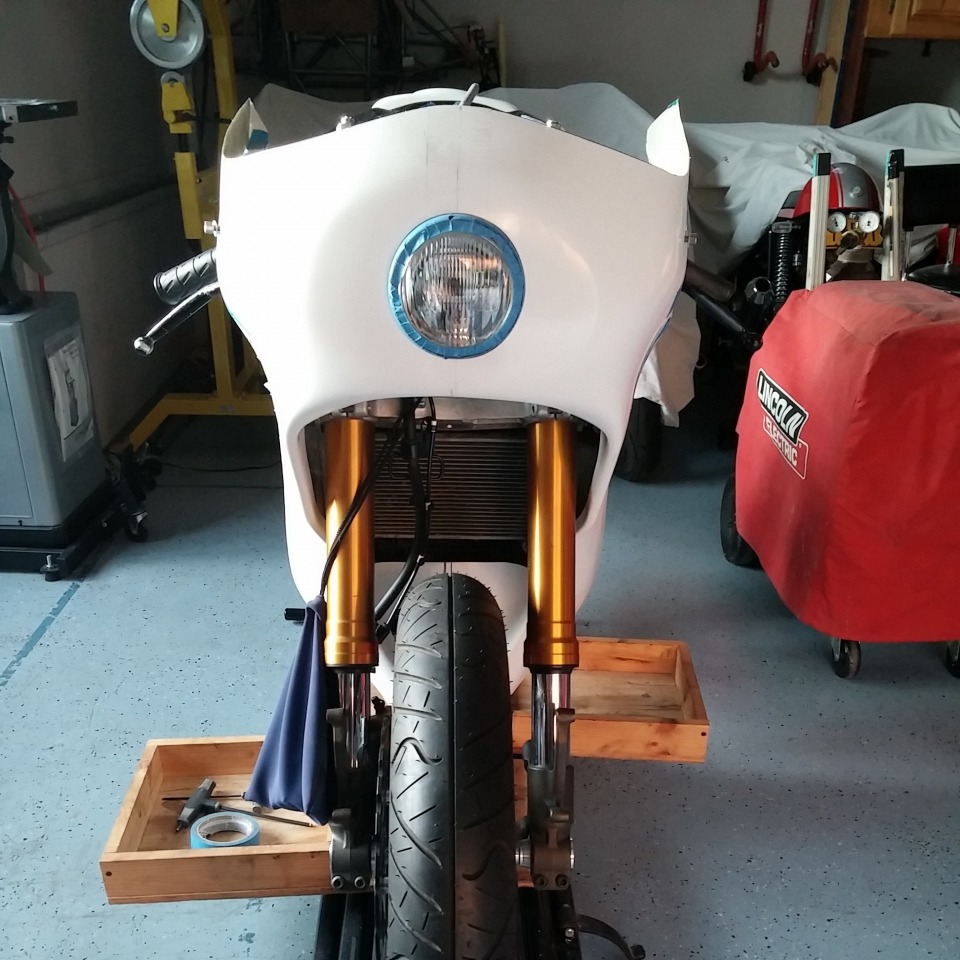
Before I got any further into it I had to try it out for fit using a friend as a test dummy. I have made this mistake in the past of not checking seating position on a custom bike and know now to make sure you can comfortably and safely sit on it and operate it.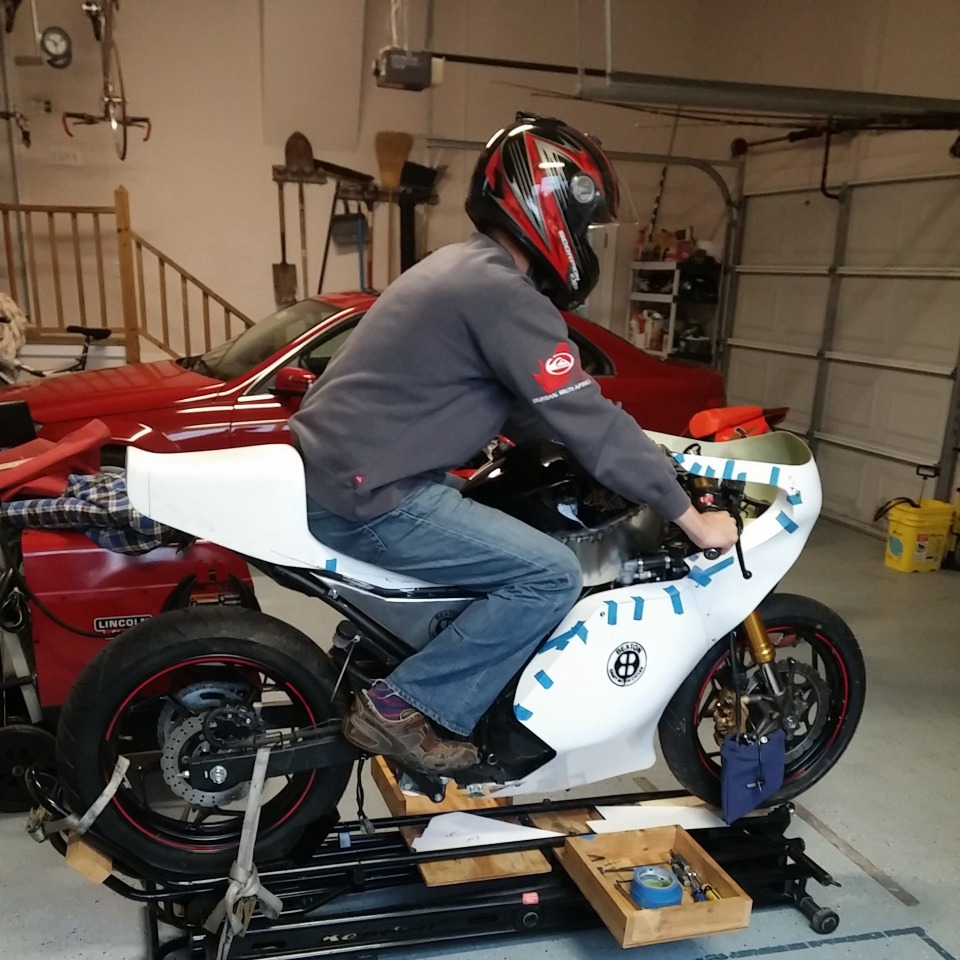
As you can see this thing is tiny and compact with low handle bars that put you forward in a racing position just like the original. Mission accomplished. Next up was the dash board mounting plate show below.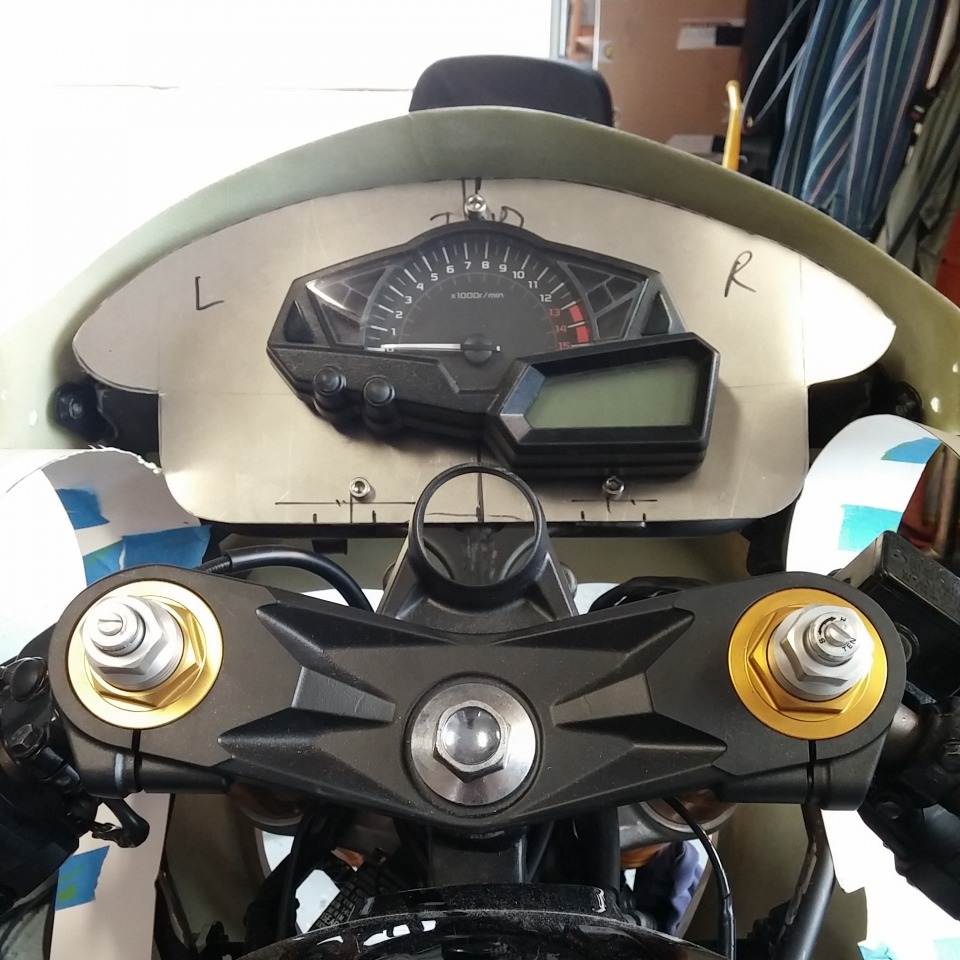
You will also see that I am using one of my custom ZX6R front ends on this bike. I have earlier post of that here. Below is the dash after some powder coating.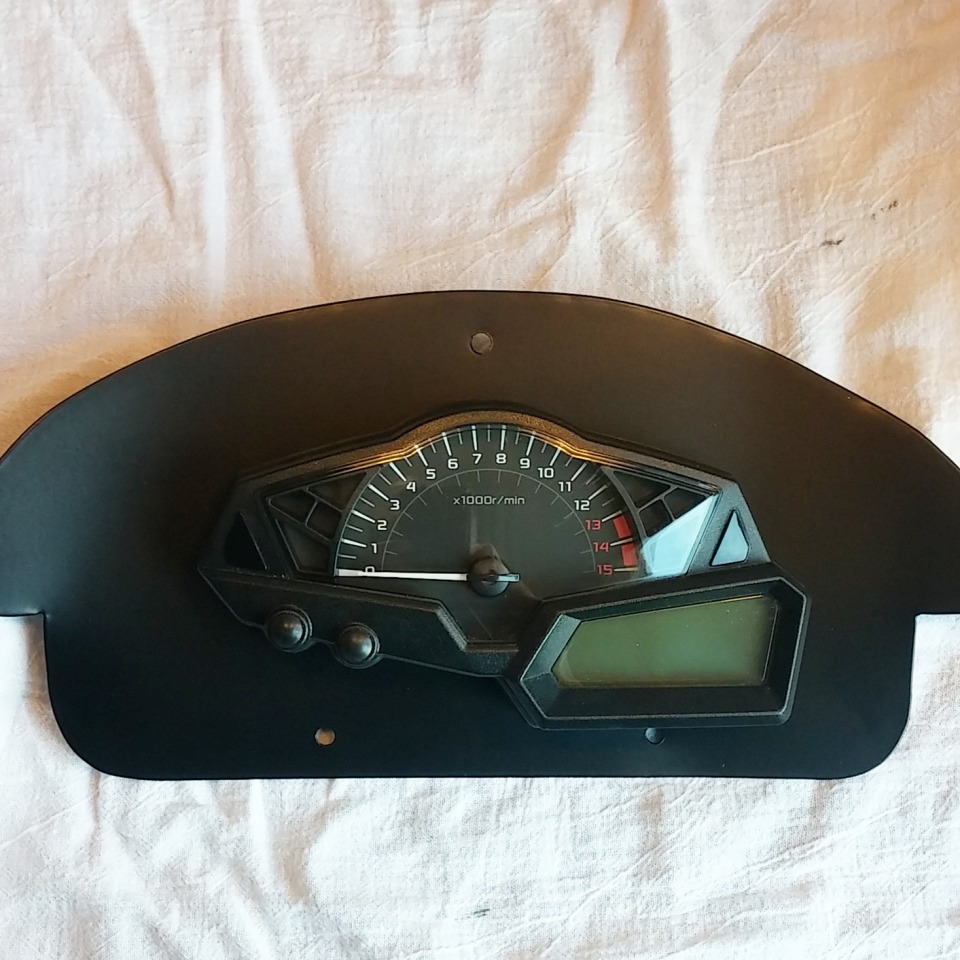
Next up is the exhaust mounting plate that I had to make. The stock unit would no longer fit due to my frame modifications.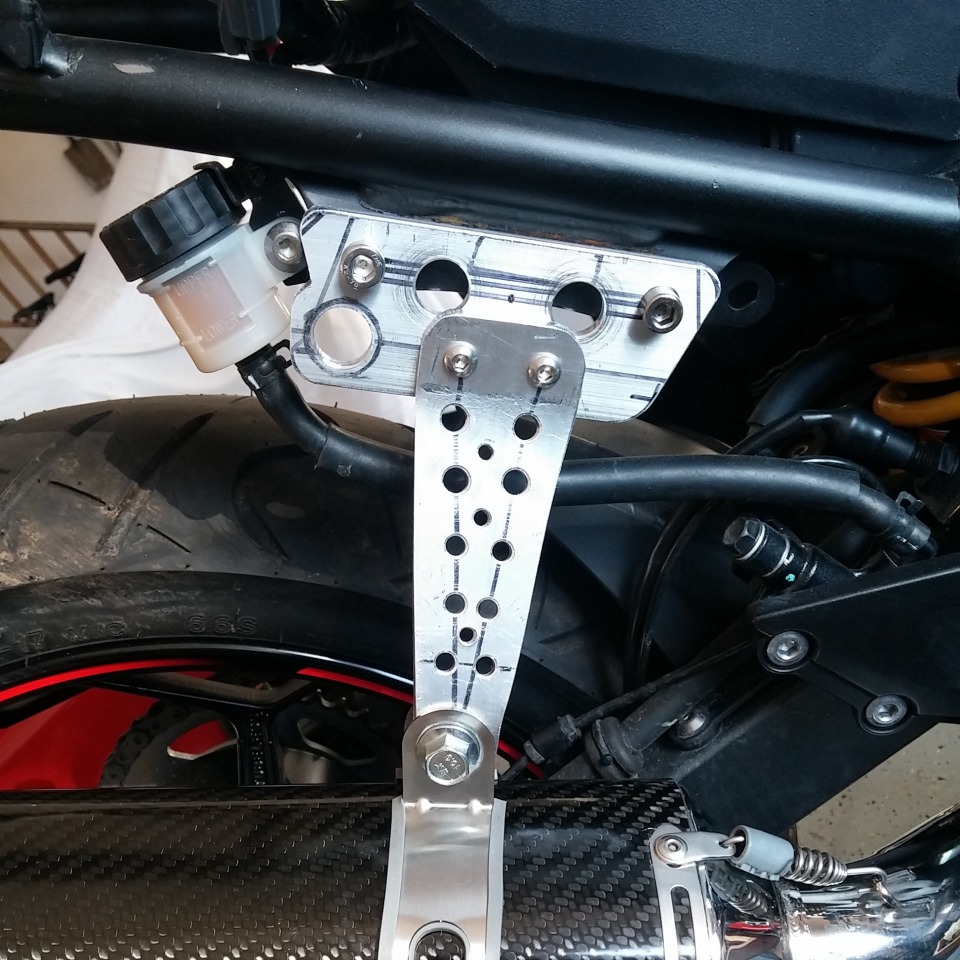
You will notice I used material called “drillium”, essentially this is any material that you drill full of holes to reduce the weight. The large hole is to have somewhere to tie the bike down with straps later on. I suspect this bad boy will be carted to the mountains a lot.
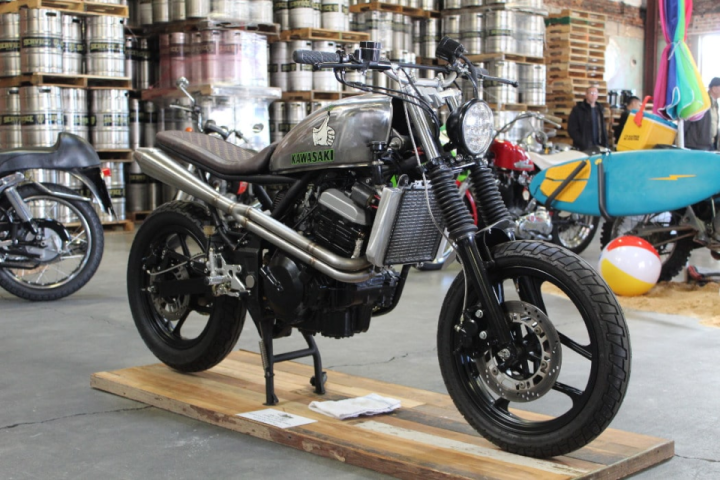
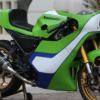
At this point all the fabrication was pretty much done and I sent the parts off the Johan’s in Clayton for paint. Johan has been doing my paintwork for a while now and he comes highly recommended. I also sent the frame and brackets off to Tom at Carolina Powder Coating who always does a fantastic job. Once these all came back it only took me a day to assemble the bike. Below are some pictures of the finished product.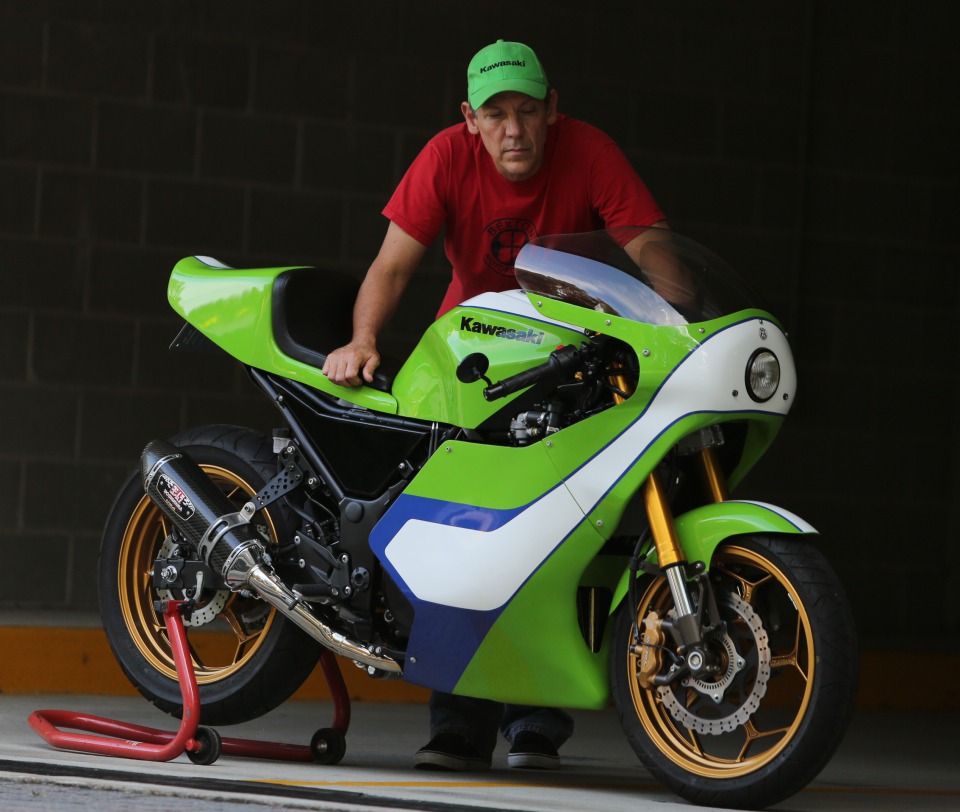
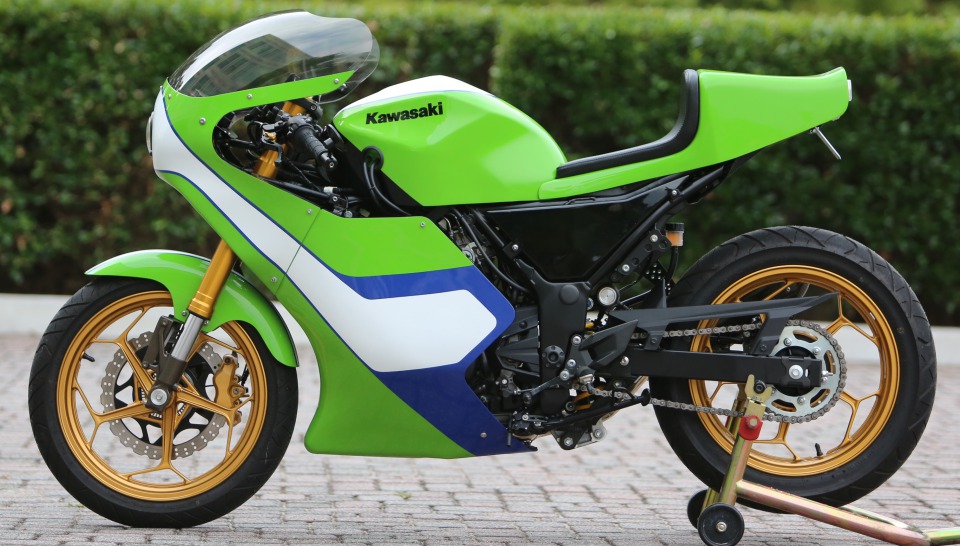
I think the final product looks very close to what I wanted to achieve. So far I have about 250 trouble free miles on it. The suspension upgrades work remarkably well. The bike is definitely also much lighter than a stock 300 Ninja. All in all I am quite pleased with the outcome.
 Follow
4.6K
Follow
4.6K