BMW K1200 S/R/Sport Cam Chain Retainer Installation
If you spend any time on the various BMW “K” Bike forums you’ll soon find threads relating horror stories about 2005-2011 BMW K1200 and 1300 having the cam chain jump a tooth on the cam chain sprockets and the pistons slamming into the valves and destroying the motor. If this doesn’t get your attention some of the repair bill amounts certainly will!
BMW must be aware of the problem because they have a two-fold “fix” for this problem. The first fix is to replace the simple spring loaded cam chain tensioner with a new and improved unit that has a reservoir to hold a certain amount of oil so when you start the bike after it sitting for a while, there is tension on the cam chain and your motor doesn’t sound like a coffee can with marbles in it for the first 45 seconds of running.
In this post, i tell you how to the installation of a $7 piece of plastic that is supposed to hold your chain in place in the event that something goes wrong and it tries to jump a tooth. I kid you not! $20,000 motorcycle with a $7 piece of tupperware to keep you out of the poor farm. Whatever!
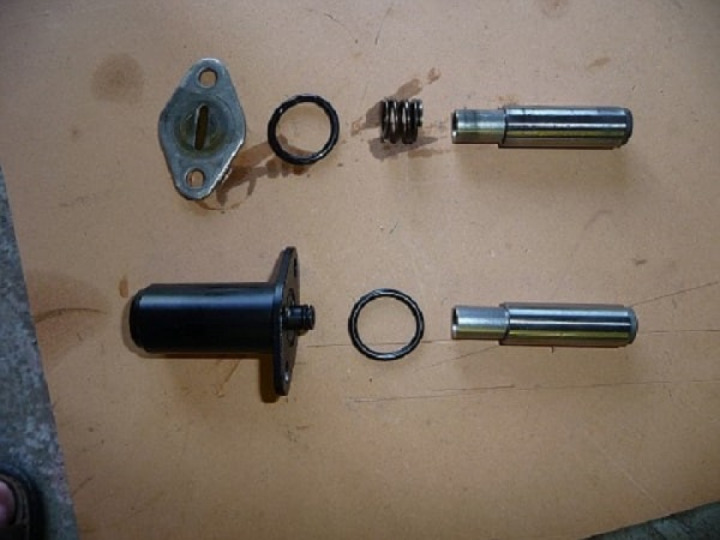
Here are the parts you will need to order: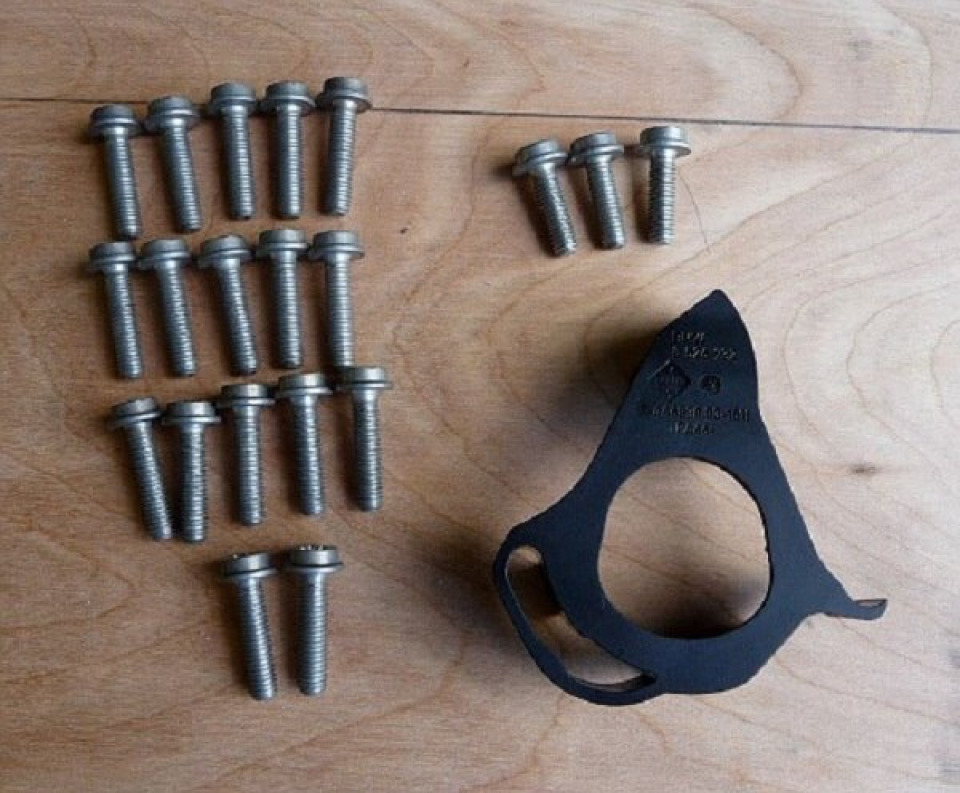
You will need (17) long Aluminum bolts BMW part # 11137676132 – $2.70 each
You will need (1) short Aluminum bolt BMW part # 11147678478 – $3.00 each (Only BMW would charge you more for less…)
You will need (1) Chain Tooth Jump Guard BMW part # 111318526932- $6.70
( The photo above shows three short aluminum bolts. You only need one as two are used simply for securing the plasic rub guard and can be reused in this non critical area)
Now, Why do you need to buy all these aluminum bolts? Because the bolts that are currently holding your clutch cover in place are a one time use bolt. Upon installation they are designed to stretch and hold the cover in place without leaking. But they can only be stretched once and then they need to be discarded.
I did not purchase a replacement gasket. The gasket that the bike comes with is a very nice silicon and metal affair. The replacement gasket is a simple paper unit that BMW has no problem charging you $25.43 for. Everyone I’ve talked to that did this modification and used the existing gasket has had no issues. Your mileage may vary. If you reuse the existing gasket and it leaks and you are forced to by the replacement, get ready to fork over another $55 for another set of one time bolts. Ugh!
The tools you will need for this work are as follows: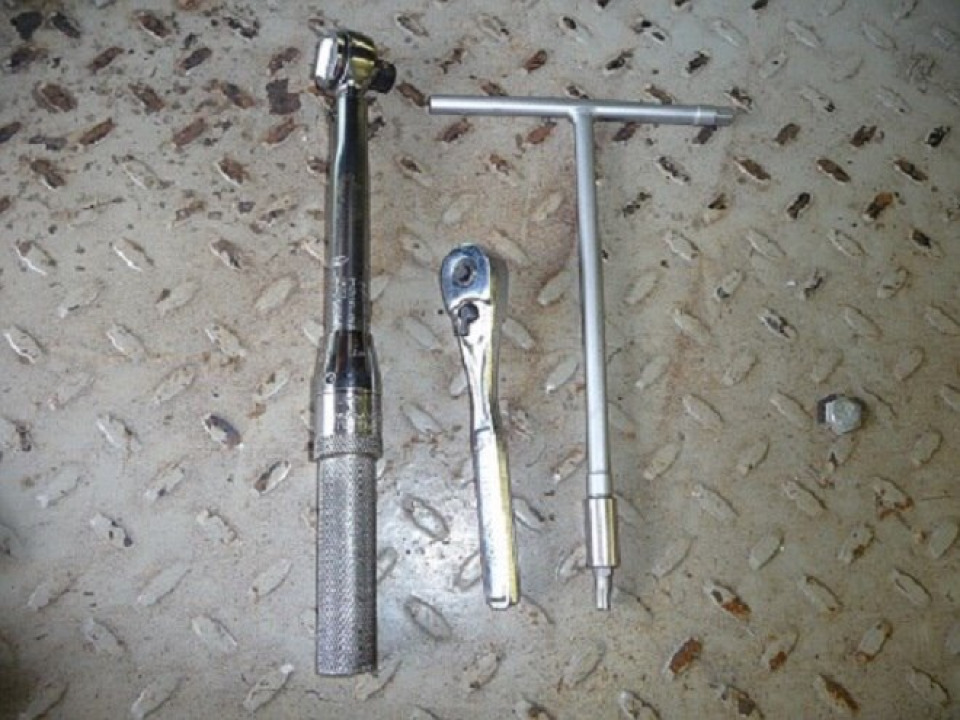
A torque wrench that can adjust down to 26.5 INCH pounds (not foot pounds), A Torx Head driver to fit the aluminum bolts and either a “T” handle or a ratchet wrench to drive the Torx driver.
OK, lets have at it!
Bike on SIDESTAND . You want it leaning that way so oil doesn’t drip out when you remove the clutch cover. Secure the bike to your lift (if you have one) What, you don’t have a motorcycle lift built into the floor of your garage? Shame! In that case, secure the side stand so it can’t retract and you bike goes falling over into your wives car and you start screaming like a little girl and words the devil himself never heard flow from your lips. Secure the bike please. You will be wrenching on it and stuff happens!
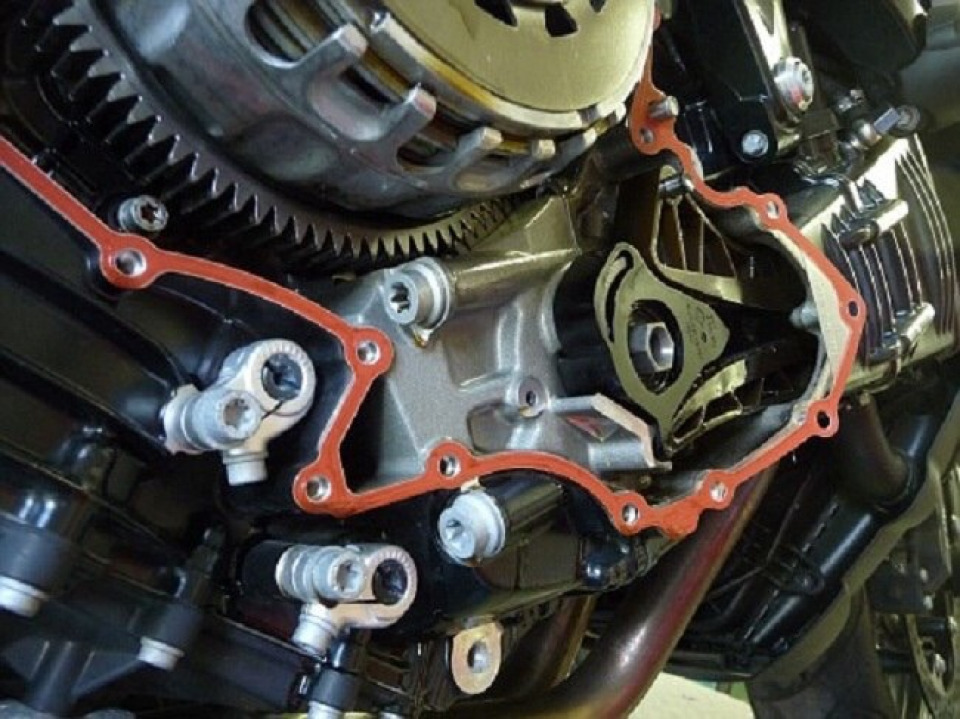
The 17 bolts that need to be removed to access the clutch area of the motorcycle are shown here: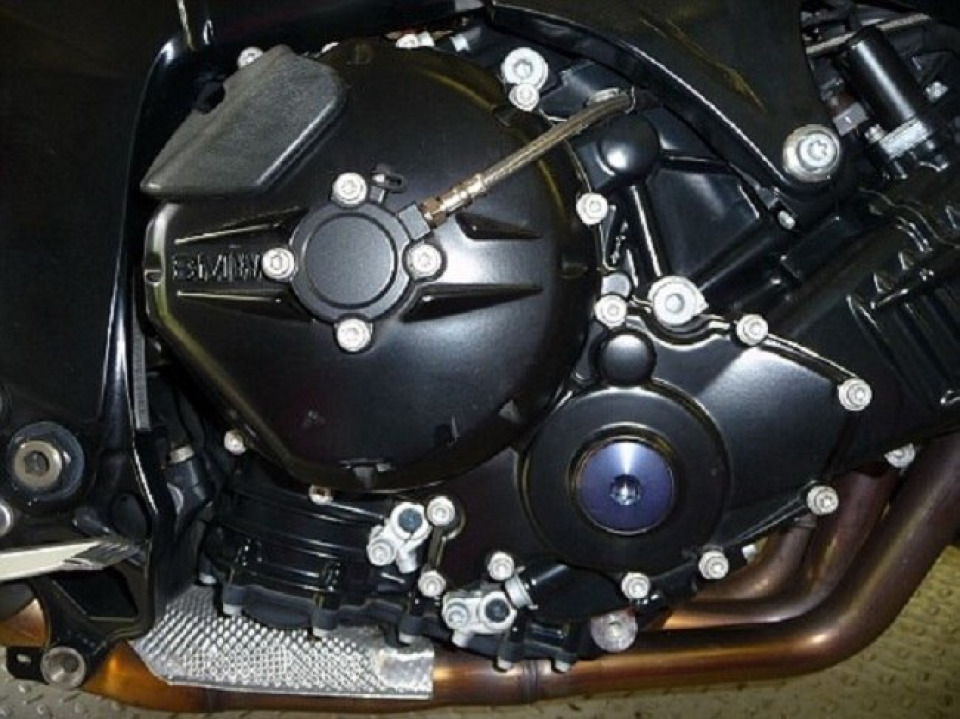
You DO NOT remove the four bolts holding the clutch actuator. That the thingy in the middle of the photo with the hose attached to it. Just leave it be.
Remove all 17 bolts, taking care to remember where the one short one goes. I use a Magic Marger to identify the one different length bolt hole or a piece of masking tape.
You do not need to remove the two that hold the plastic foot guard. But I did because I didn’t know any better. But now you do!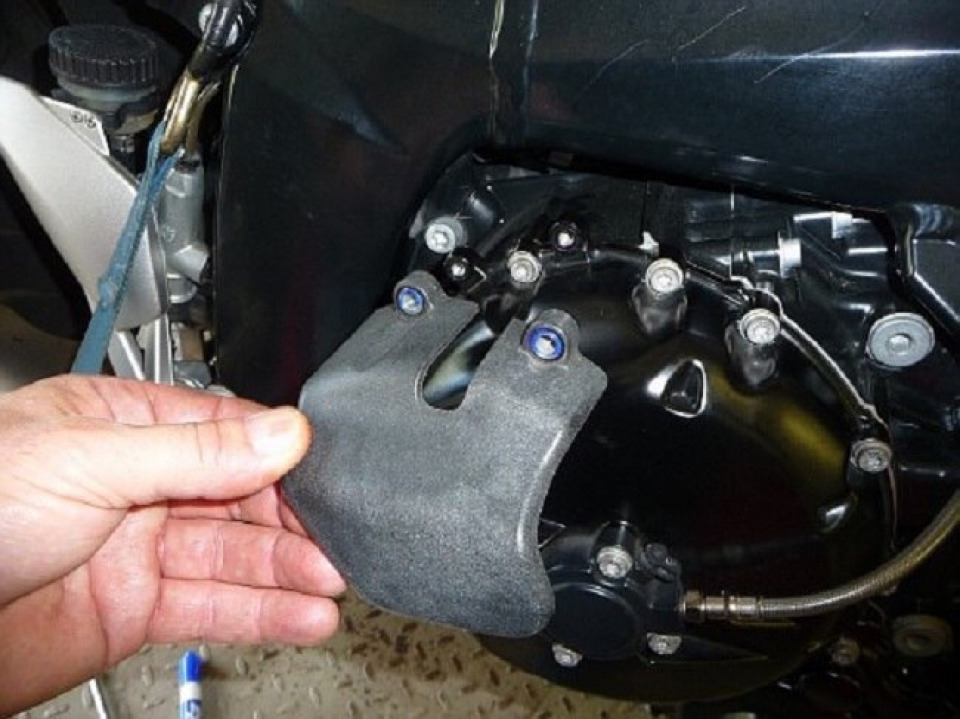
See the Blue Majic Marjer identifying where two short bolts go. Trick huh?
OK, so now all the bolts are out and you can very easily pop the cover off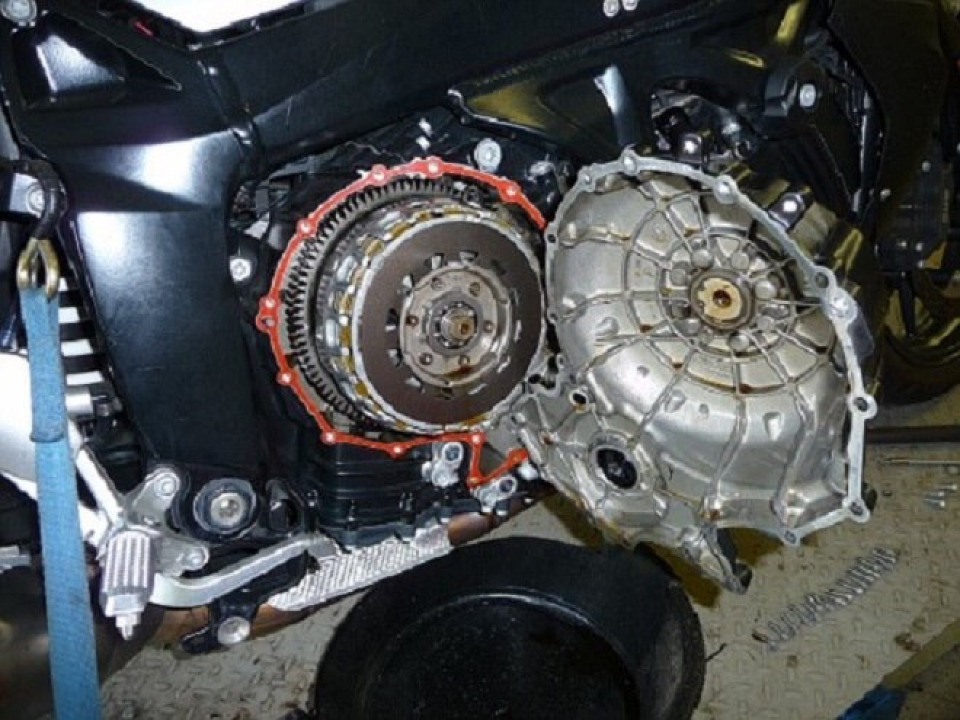
Secure the cover with a piece of wire or string to take the strain off the hydraulic line for the clutch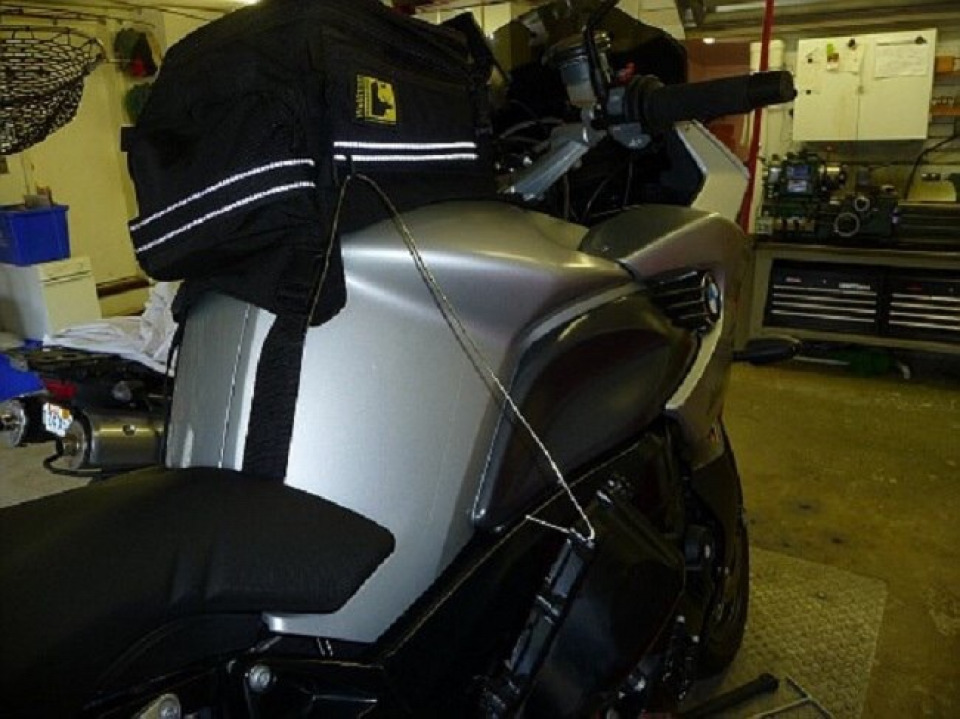
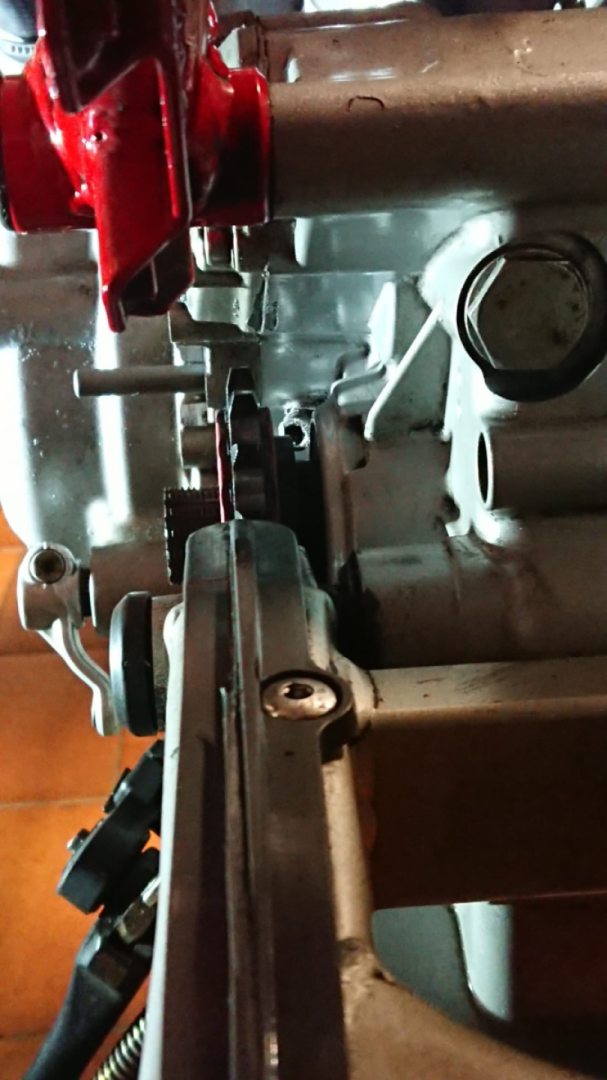
This is the chain and sprocket we are interested in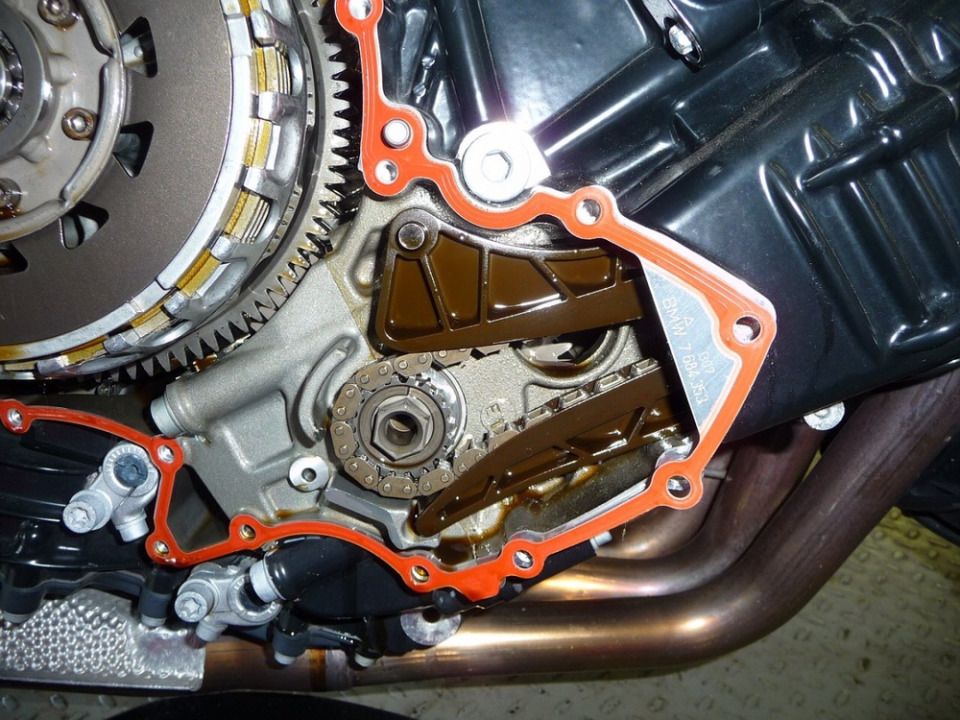
Take the little plastic retainer and simply pop it over the rear cam chain sprocket.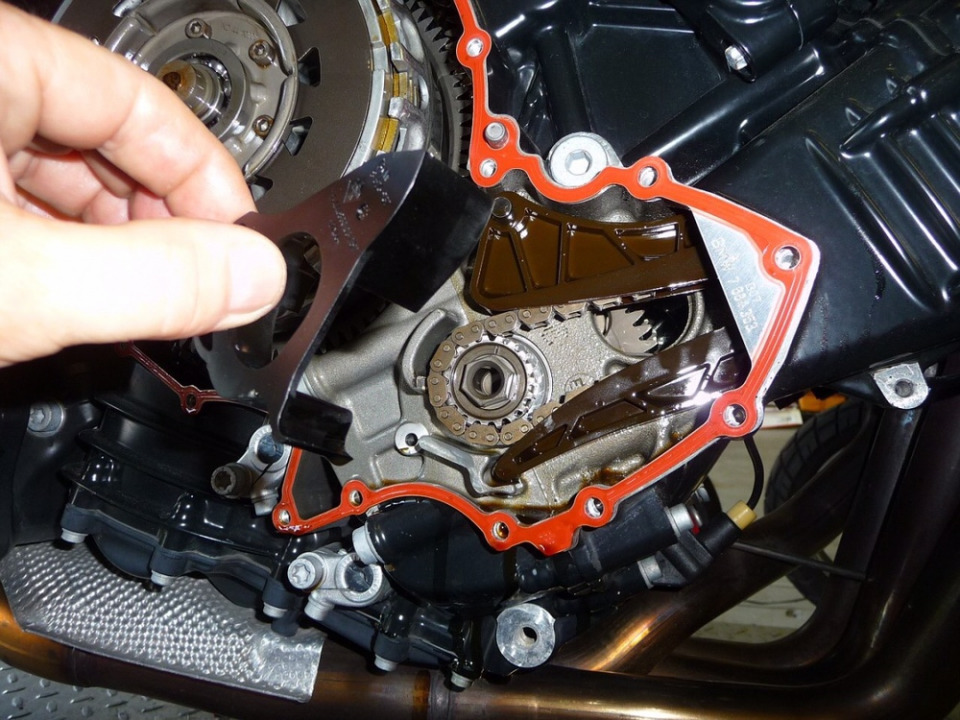
Simple friction and the clutch cover hold it in place.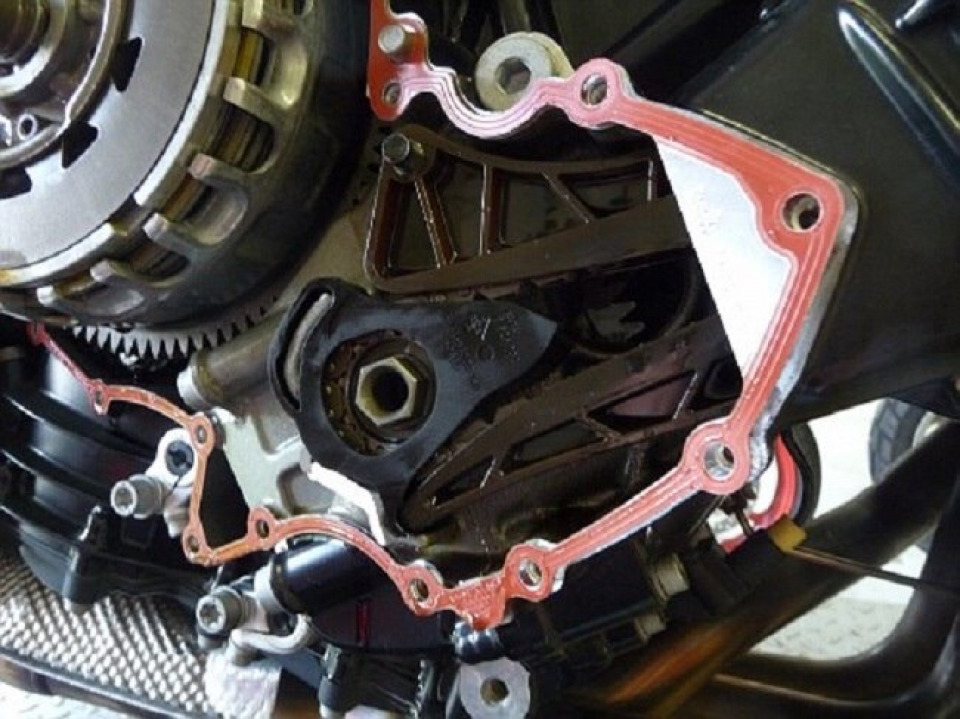
Time to put the clutch cover back on. The only issue here is the hardened bearing that the clutch actuator rides against, It needs to go “flat side in towards the engine”.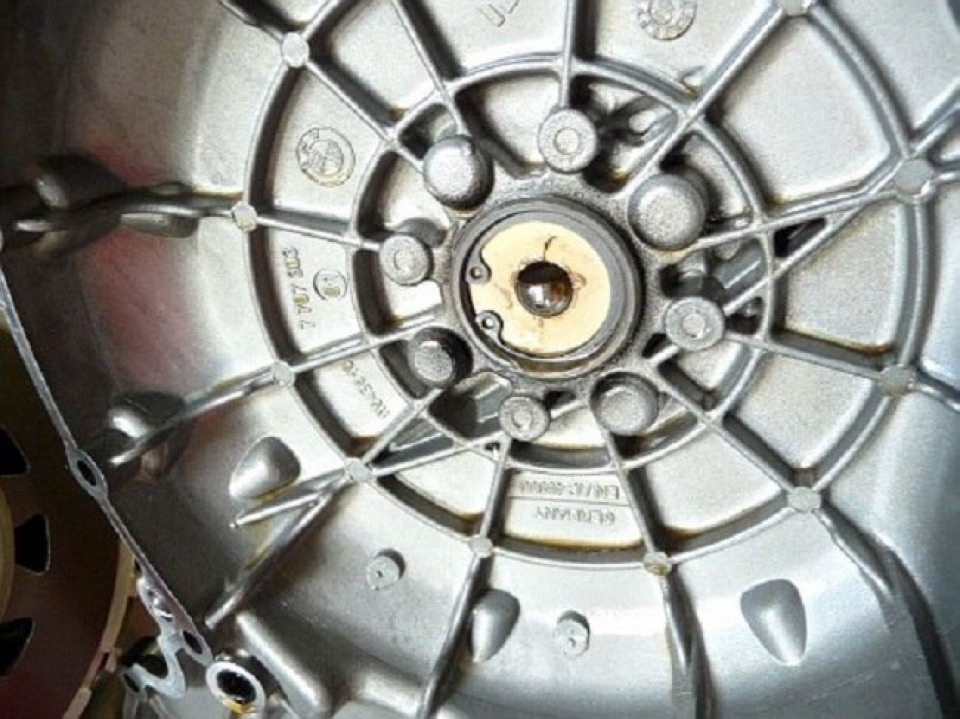
The above photo shows it NOT in the correct position. The flat side needs to be pressing against the clutch shaft. It will move on you as you try to reinstall the clutch cover.A bit of thick grease will hold it in place while you are reinstalling the clutch cover.
This is the shaft on the engine side that this little bearing needs to bear against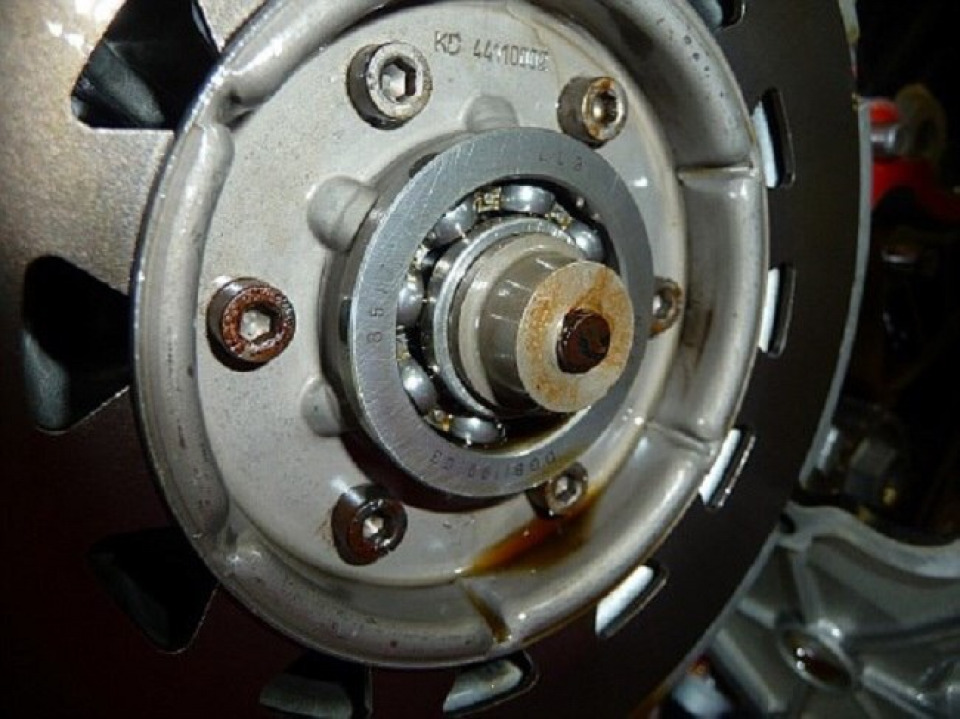
Don’t force the cover! It’s made out of BMW aluminum which is one step above hard wax. There are a couple of locating pins to line up. They need to be lined up together or you will be fighting to get the cover on. There is also a bit of spring resistance to contend with. Get the locator pins lined up and insert a bolt on a top and bottom hole to pull things together. If it takes more than a very simple effort, you need to check that bearing again. If it isn’t in the correct location it will cause all kinds of grief.
Once the cover is back in place you can start reinstalling the NEW aluminum bolts.
These bolts need to be torqued to 26.5 INCH pounds and then turned another 90 degrees to “stretch” them the appropriate amount.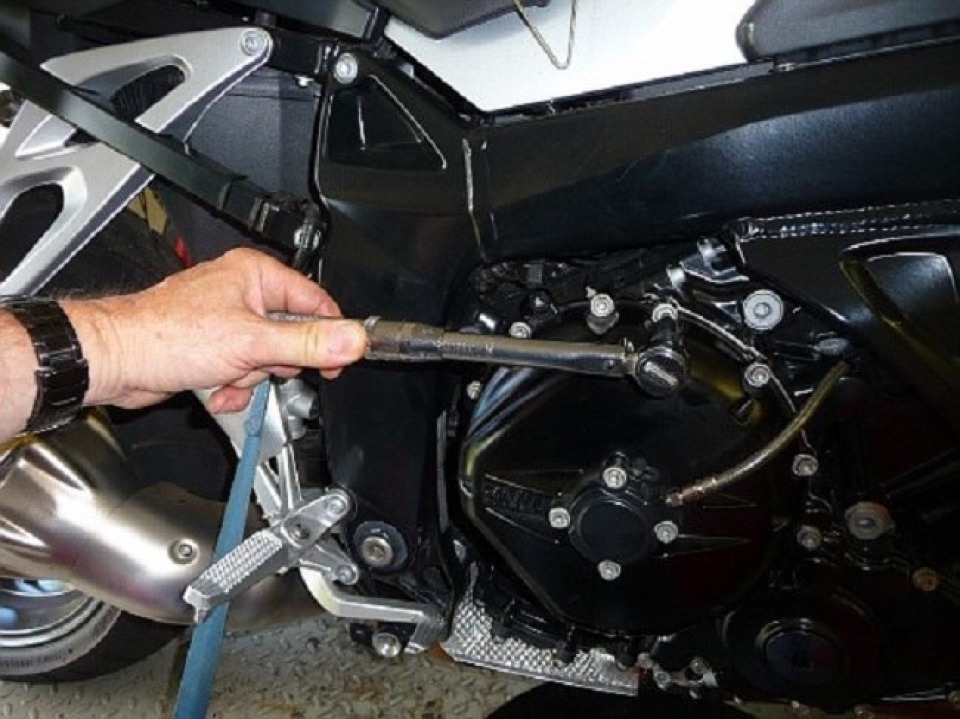
Torqued.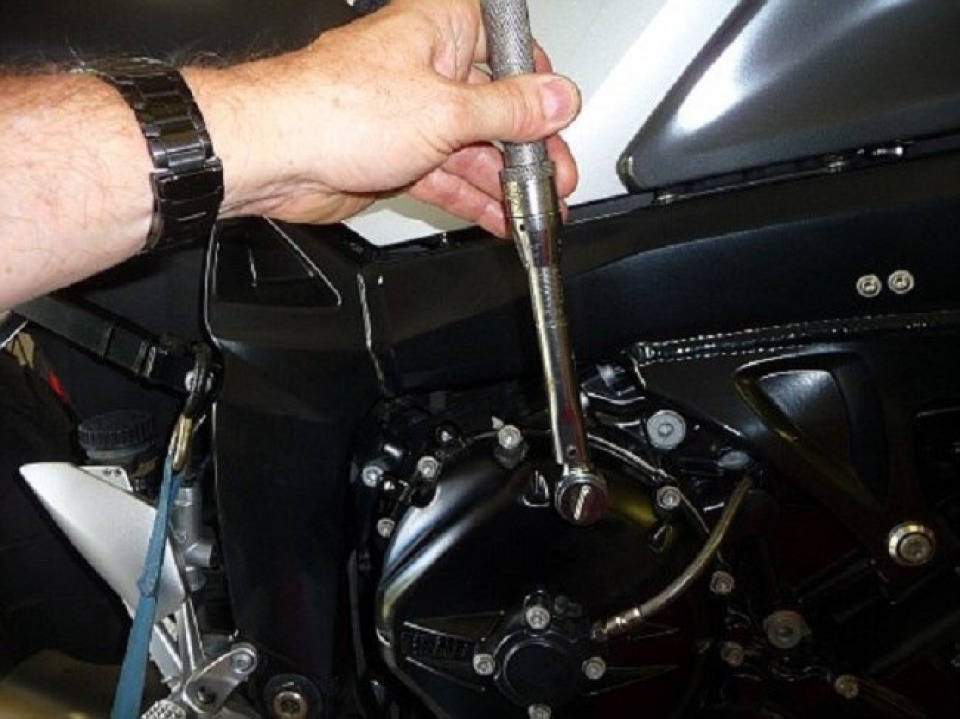
And then the wrench is turned another 90 degrees.
Do them sequentially. You know, Top, Bottom Left, Right, 1 O clock, 7 O clock, etc. Torque first and then go around again and do the 90 degree dance.
NOW, if you think you can simply skip the torque wrench step, I’m here to tell you, you are mistaken. You will not believe how little torque 26.5 INCH pounds is. And how easily these bolts turn the next 90 degrees. My grandsons PlaySkool workbench with rubber nuts and bolts feel more secure than these bolts do! Amazing!
That’s it! Start her up and let it rip! Check for leaks. Check to be sure the clutch is working properly. You should be good to go!
This project took me 30 minutes and I did it in street cloths. This is an extremely clean project if your bike is half way clean. And real easy with a lift…..
With the bike on the sidestand, I only loss a tablespoon of oil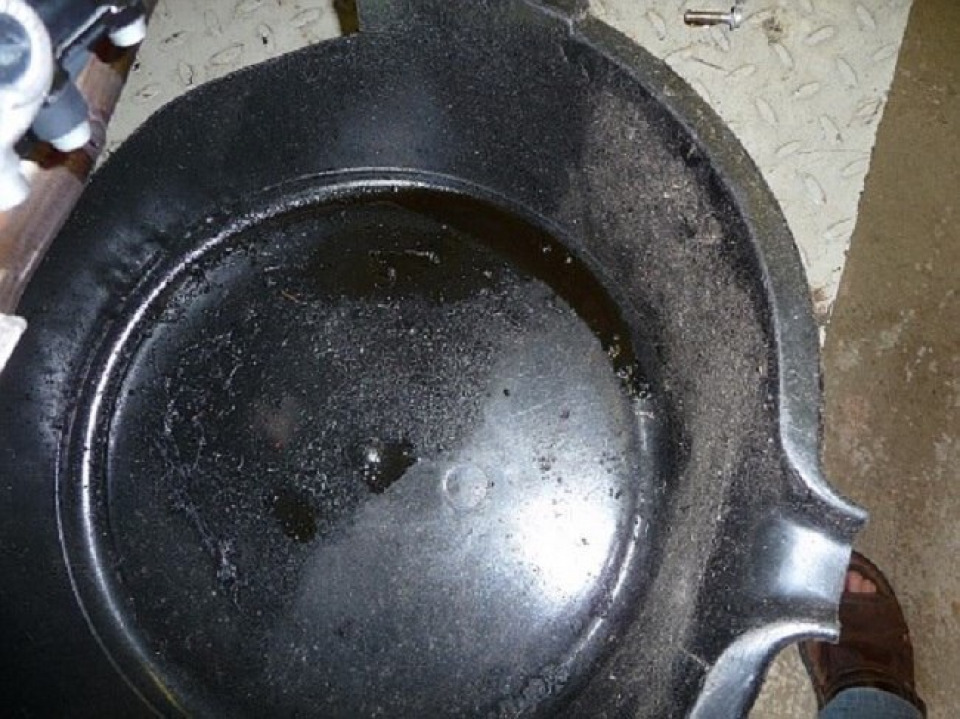
I hope you enjoyed this little article and it was helpful.

 Follow
5.2K
Follow
5.2K