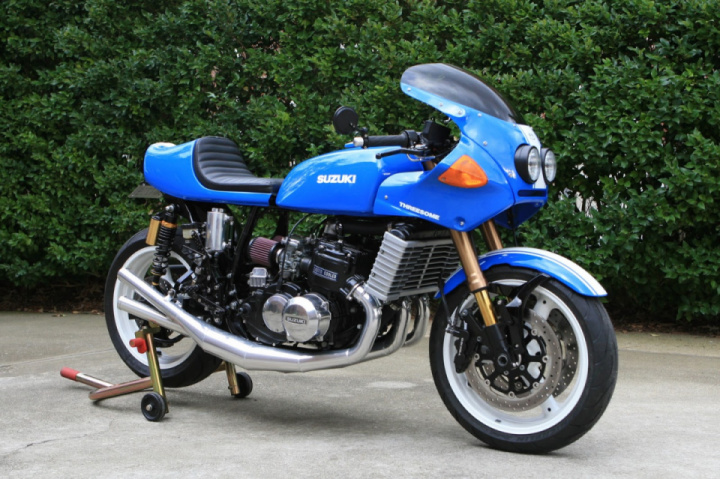
Suzuki GT750 Threesome project.

The GT750 and I go back a long way. As a matter of fact I have some permanent scars and broken bones from crashing one in my late teens. I have also owned 4 of these over the years. The 1974 to 1976 models were always my favorites. They made good power and responded well to light modification. The only drawback I remember, quite fondly actually, was the handling.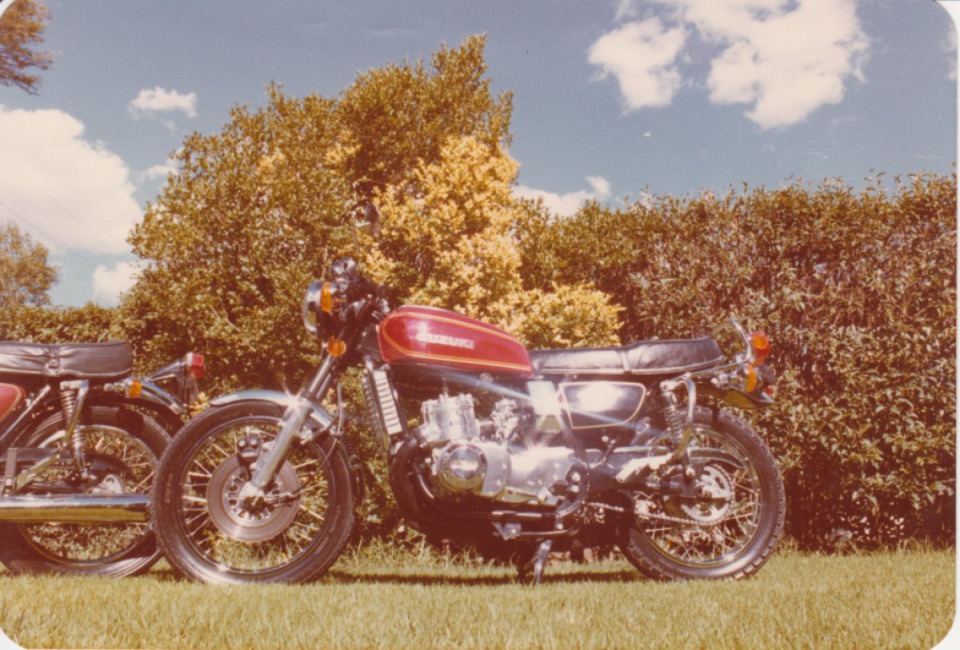
After experiencing many a tank slapper on a GT750 you learned to get used to the feeling of a flexing chassis. It never got out of control completely but scared the remnants of last nights curry out of you often. The swingarm bushings were made of plastic and would wear out after a few thousand miles especially if you rode it hard. Most guys went with brass bushings to alleviate the issue but alas it required a lot more to make them actually “handle”. Even stopping involved planning and stopping distances even with twin disc brakes up front was still quite poor. They were after all more of a touring model than and actual sportbike. But that engine, boy and what an engine it is. Even in stock form with stock exhausts it tends to draw your immediate attention. It sounds like no other bike out there even today. So for about 10 years I have been wondering what a GT would be like if it handled and stopped like a modern bike. Enter the GT750 Threesome project.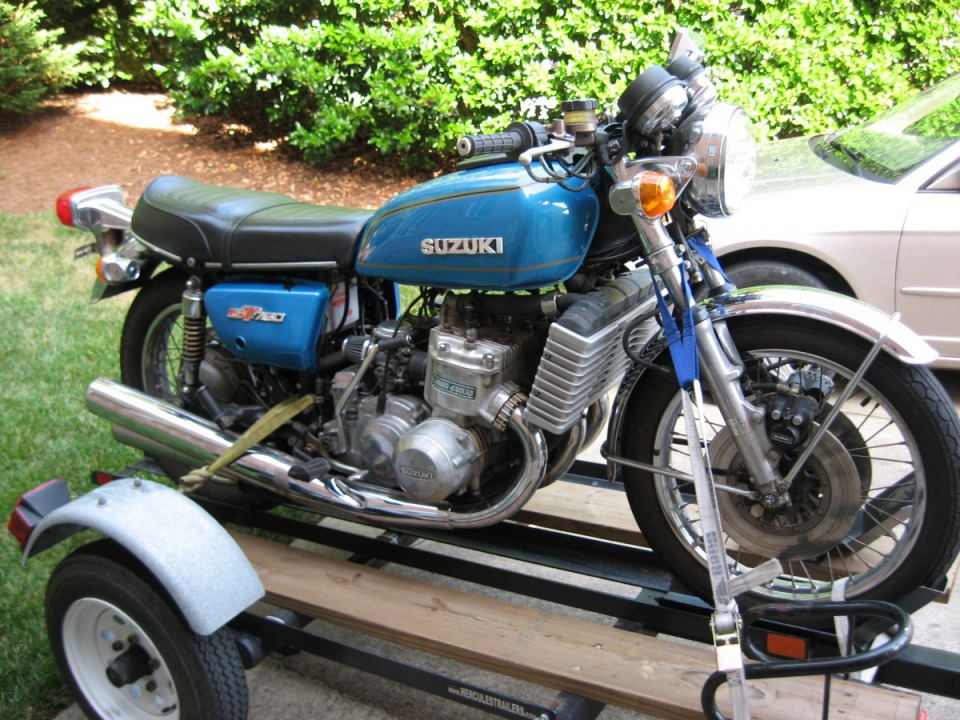
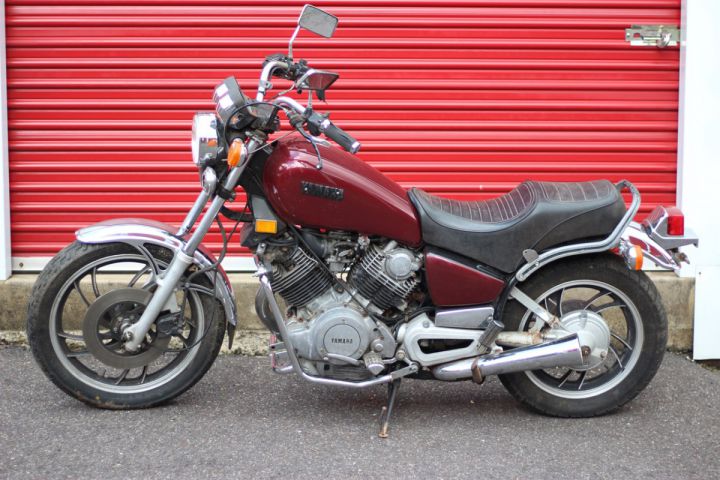
I purchased it in Tennessee from Craigslist. The seller definitely got the better deal since after some closer inspection the bike had many serious issues and required complete disassembly. It was advertized as “ride it anywhere”, quite funny if you read what follows. When I tried to ride it the first time just to see how it runs, it was unstable with seriously worn bushings and fork seals that leaked, did not stop well, leaked brake fluid and started to overheat after about 3 miles. After that first attempt I parked it and hung up the keys, realizing that the seller either had no idea or he saw me coming and that riding it as is was just plain dangerous. None the less I think in the end I did get a solid platform for a project, which is what I wanted.
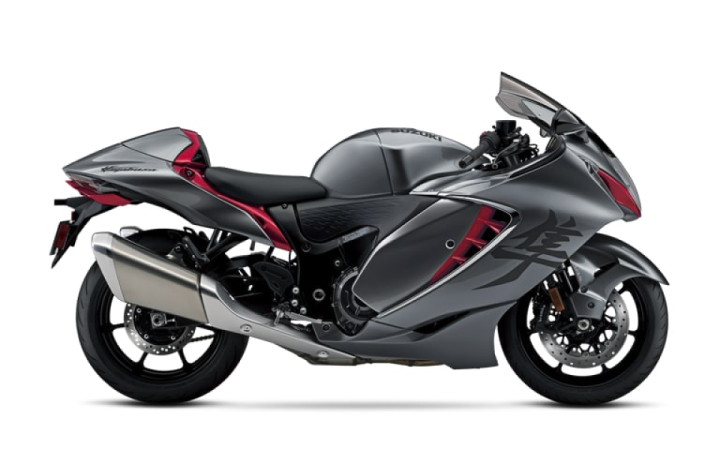
So the scheming started fueled by some hopped beverages, usually Sweetwater IPA. I imagined that back in the 70’s this was Suzuki’s Hayabusa. The Busa has great front suspension (like a GSXR) and those 6 pot front brake calipers look fantastic on any front end. So a few weeks later the complete Hayabusa front end arrived at my house. I had broken the ice and the project was on it’s way.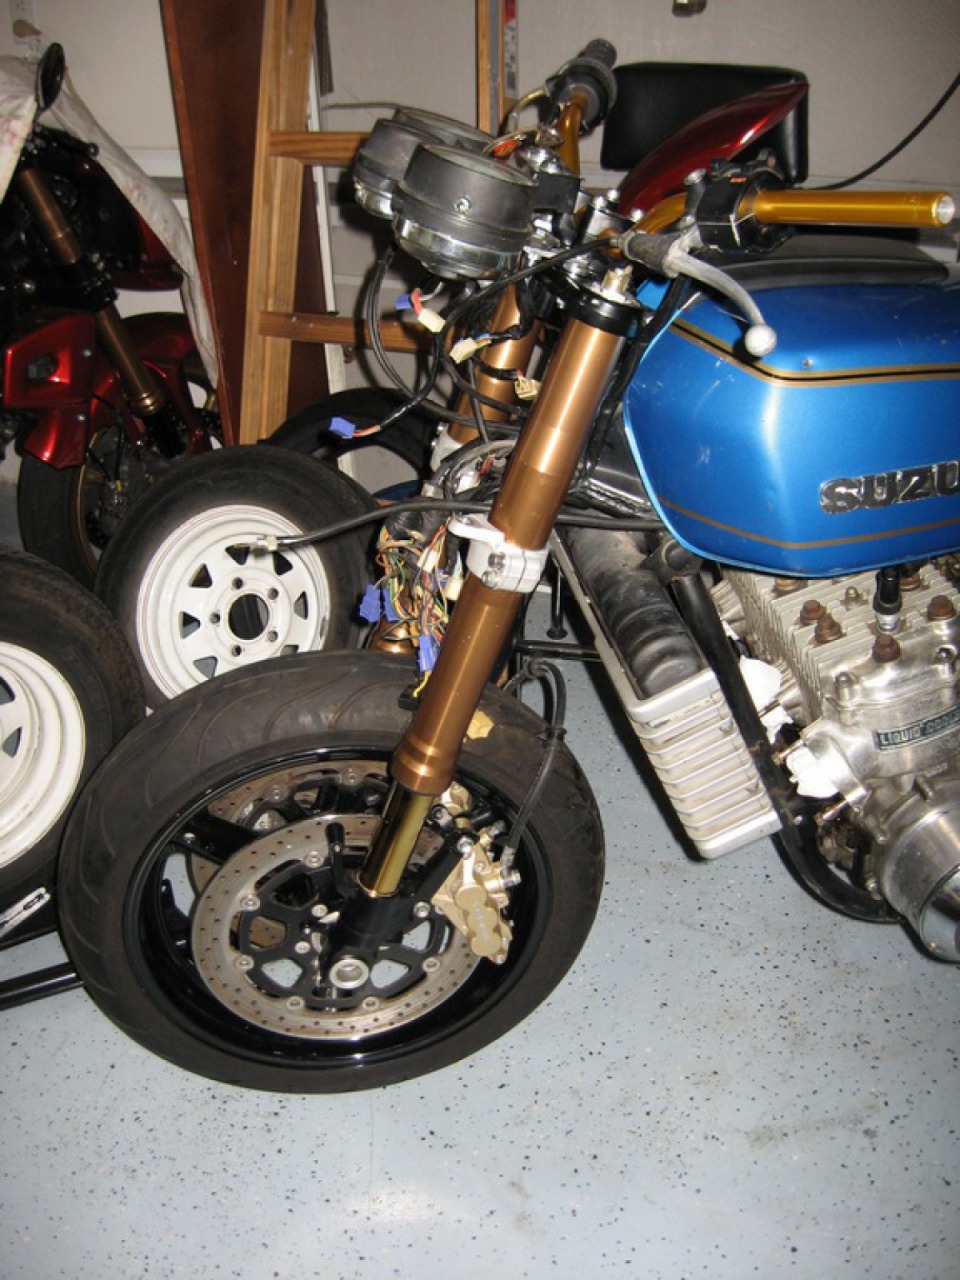
Next was the rear suspension. The plastic bushings and flexi swingarm had to go. So after another week or so the Suzuki GSF750 Katana swingarm and rear brake setup arrived. Now this was not exactly what I call a bolt on like the front end. It required some serious fabrication and the swingarm was shortened by 90mm and narrowed in the front by about 30mm. Then I fabricated and welded the front tubular section back onto the swingarm and also welded on some mounts for the two rear shocks. I used the stock Katana swingarm bushings with some inserts to space them properly and keep them riding on the stock GT swingarm spindle. This was probably the item that required the most work, but I wanted to keep the original wheelbase. Almost every other GT I have seen with a swingarm modification ended up looking like some stretched street drag race bike. I wanted it to look right and keep the dimensions similar to the stock bike.
Showing how much longer the Katana swingarm was when I chopped it.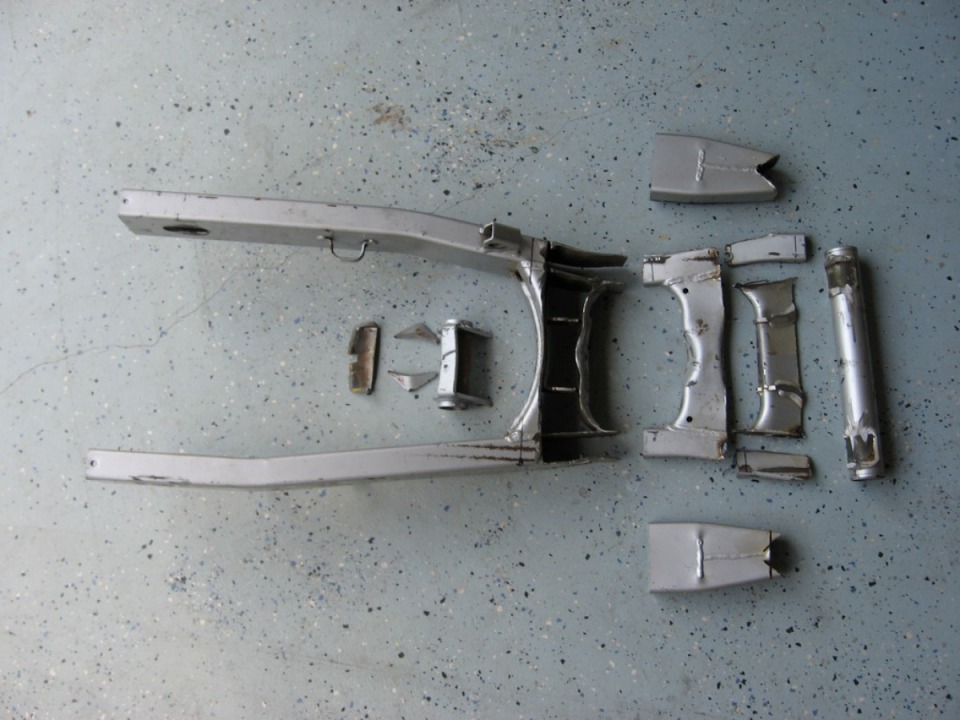
All the pieces after hacking away to shorten it.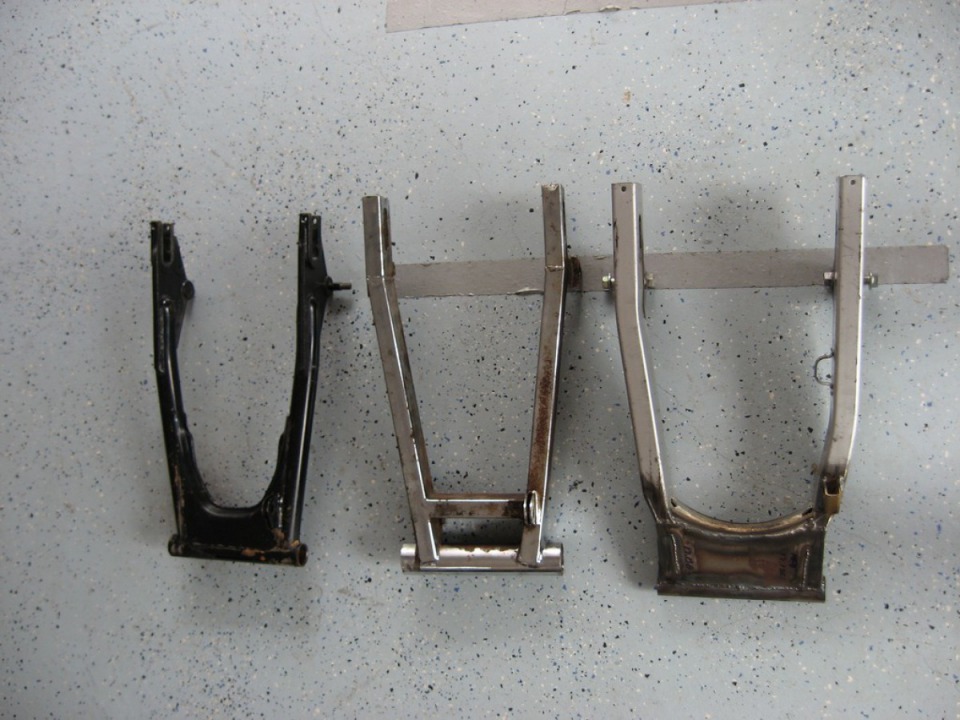
Showing the new swingarm versus the stock unit and also a Dresda unit which was the performance upgrade in the 70’s. Much beefier, stiffer and lighter.Next was the rear sets. I plan to use some custom expansion chambers so the footpegs and controls had to be moved. I used a custom set made for a Suzuki SV650 and modified the stock units to accept the new ones as a direct bolt on.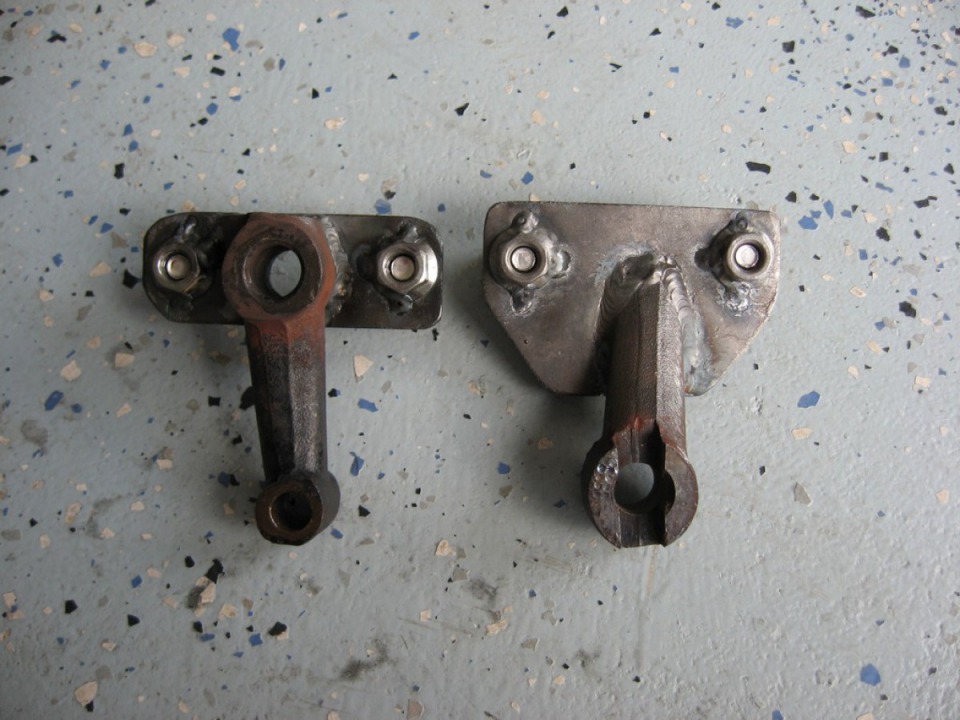
Apart from making the rear sets adjustable I also had to make some extensions to clear the expansion chambers. I had to do this later after I realized the expansion chambers will not clear.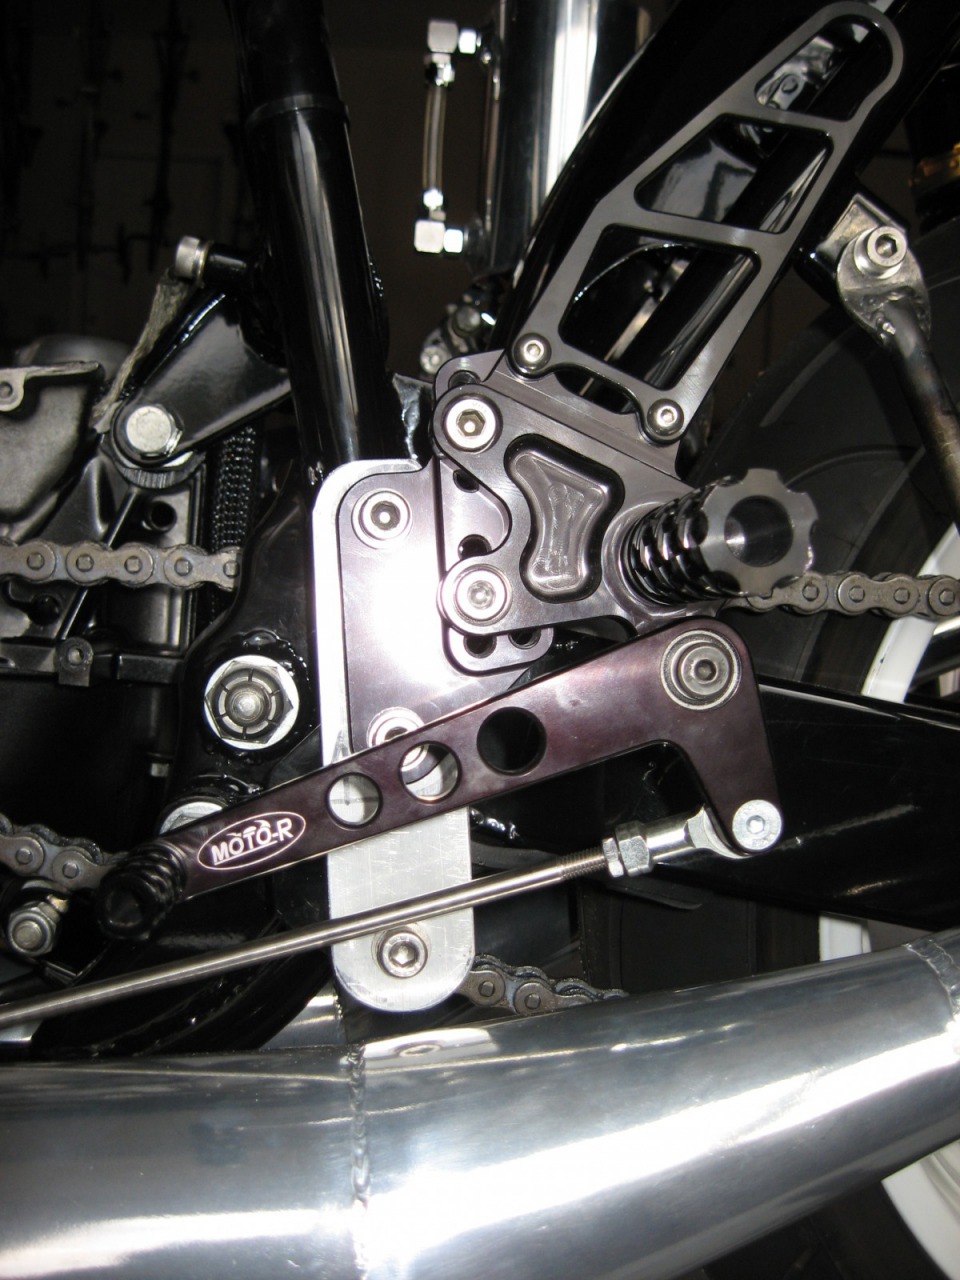
This is where my first post ended and is the start of my 2nd post, so you know where to pick it up again.
OK so last I posted quite a bit on the initial fabrication. In this update I will cover all of the fabrication up to powder coating of the frame and swingarm. I did not know which tail to use and ordered both the Suzuki TR750 Race seat as well as a Rickman seat. I ended up choosing the Rickman seat as pictured below. The TR750 seat was larger at the rear and shorter in the front and was a bit cramped. It also did not look right with the stock gas tank.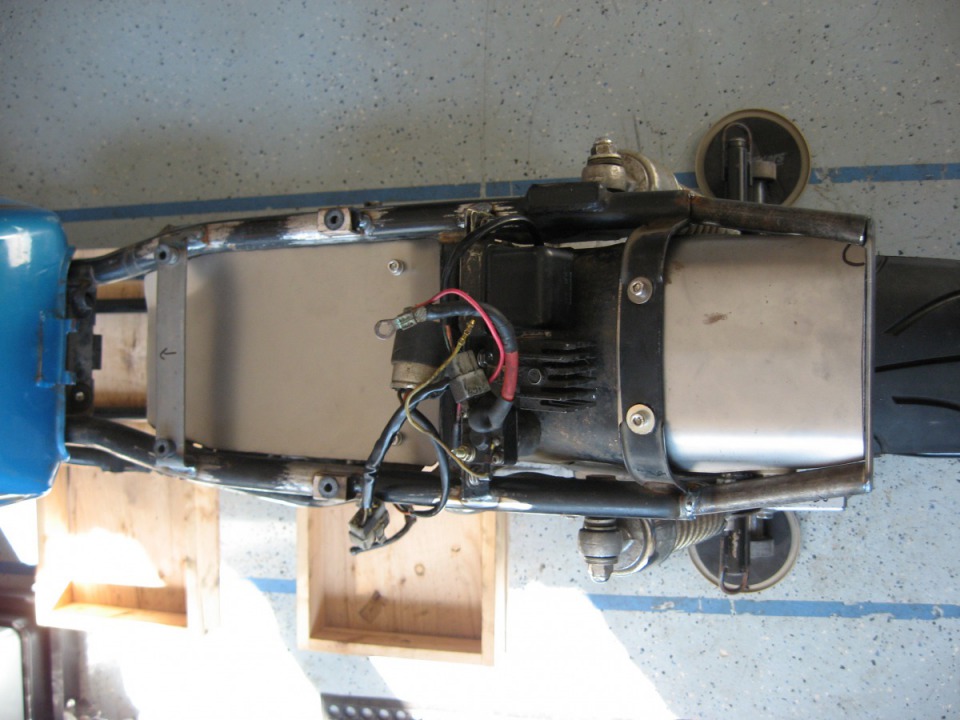
This second picture shows the battery tray that was made from angel iron sections. I plan to use a battery from a Daytona 675 and will mount it on its side to keep the profile low.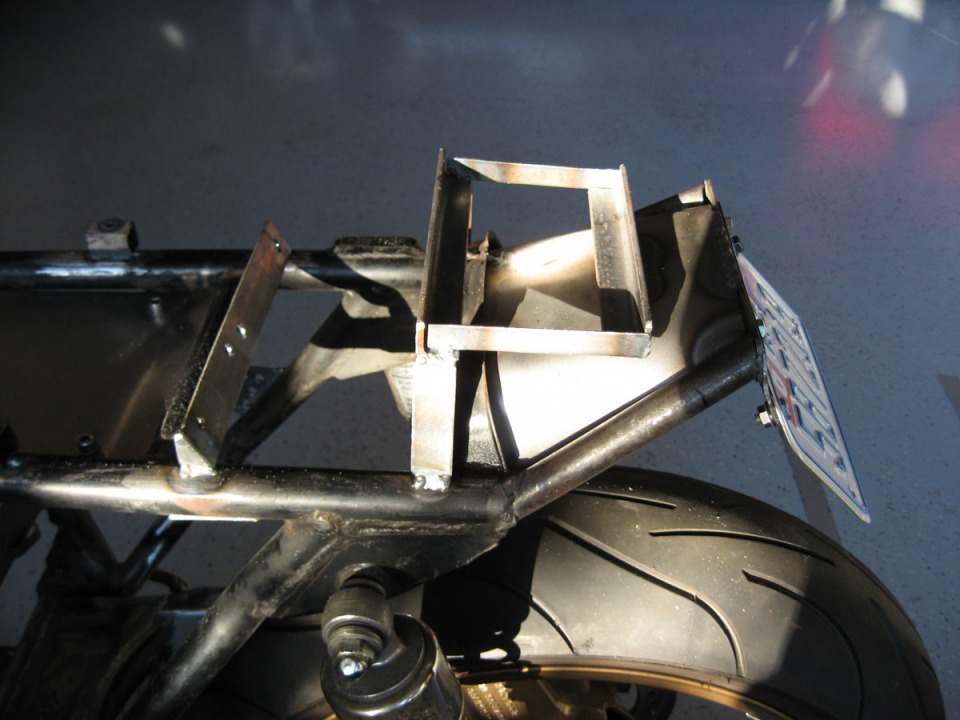
Next I started working on the front end. I was going to use just a regular headlight initially but then decided to try a fairing. I ended up using a fairing from a Ducati 750 SuperSport from the 90’s, not sure what year exactly but it looked period correct and fit the 80’s theme I am going after. This required me to mount the gauges inside the fairing and I wanted to mix old and new so I ended up using the water temp gauge from the GT as well as the idiot lights and the gear indicator. I figured that would help retain some of the original unique parts of the bike. Here is a picture of what I came up with, still unpainted.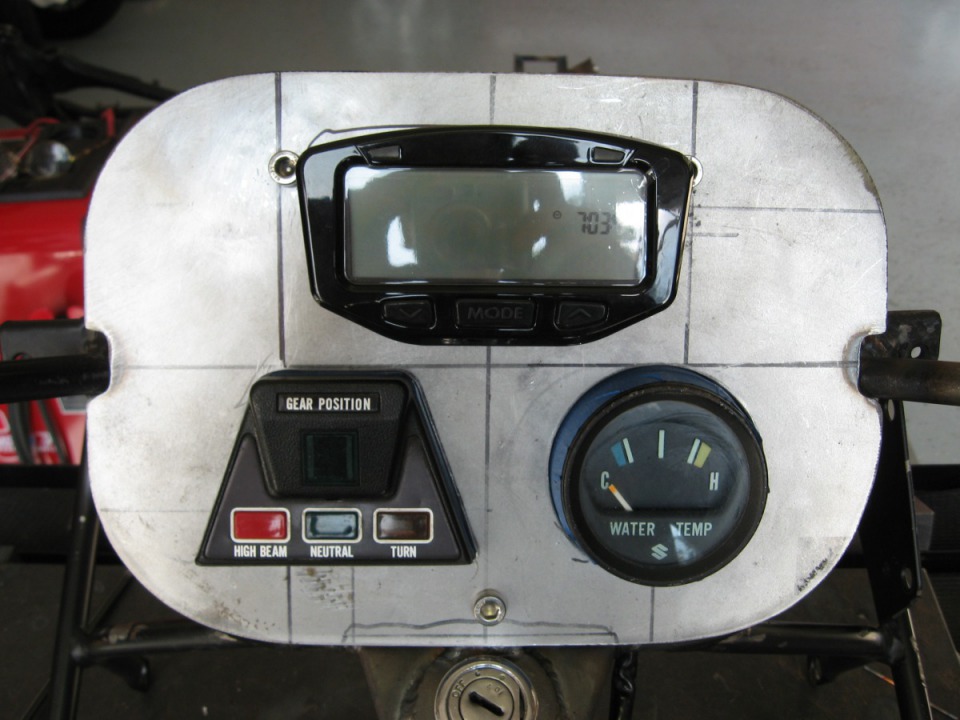
Next I wanted to remove the original passenger foot peg mounts and add some new exhaust mounting tabs as well as some frame bracing. I figured I removed some strength by removing the box section rear set mounts and had to put it back somewhere. This is what it looked like with the passenger peg mounts removed.
Below is the sections I removed. I am sure they were overbuilt originally and since they doubled as exhaust mounts I will have to weld on new exhaust mount tabs and make some hanger later.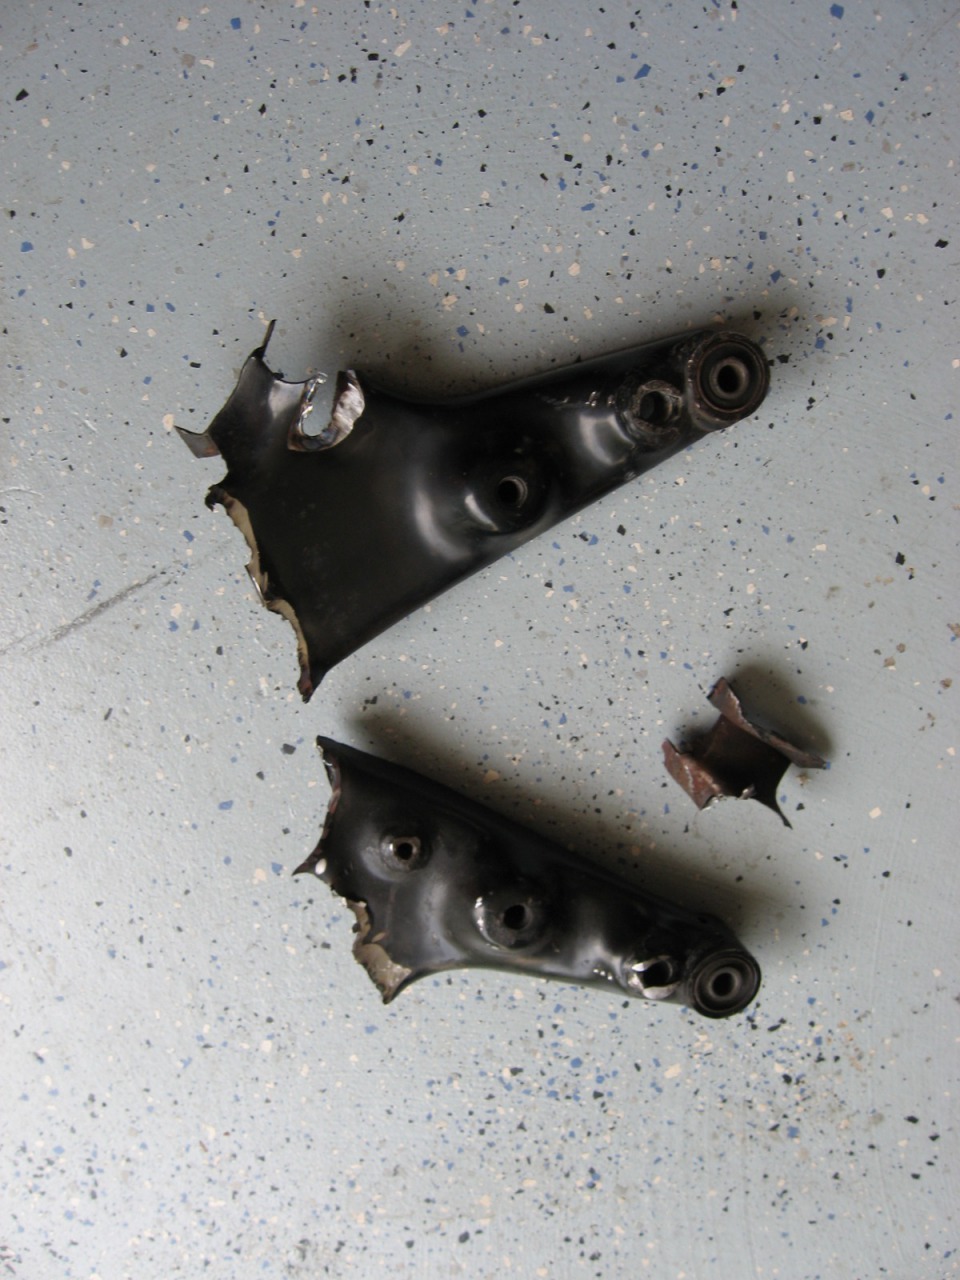
I then welded on some tabs for the exhausts and also a tab to mount the new 2-stroke oil tank. You will also note in the picture that the shortened swingarm now has a very nice chain guard from a 1200 Bandit.
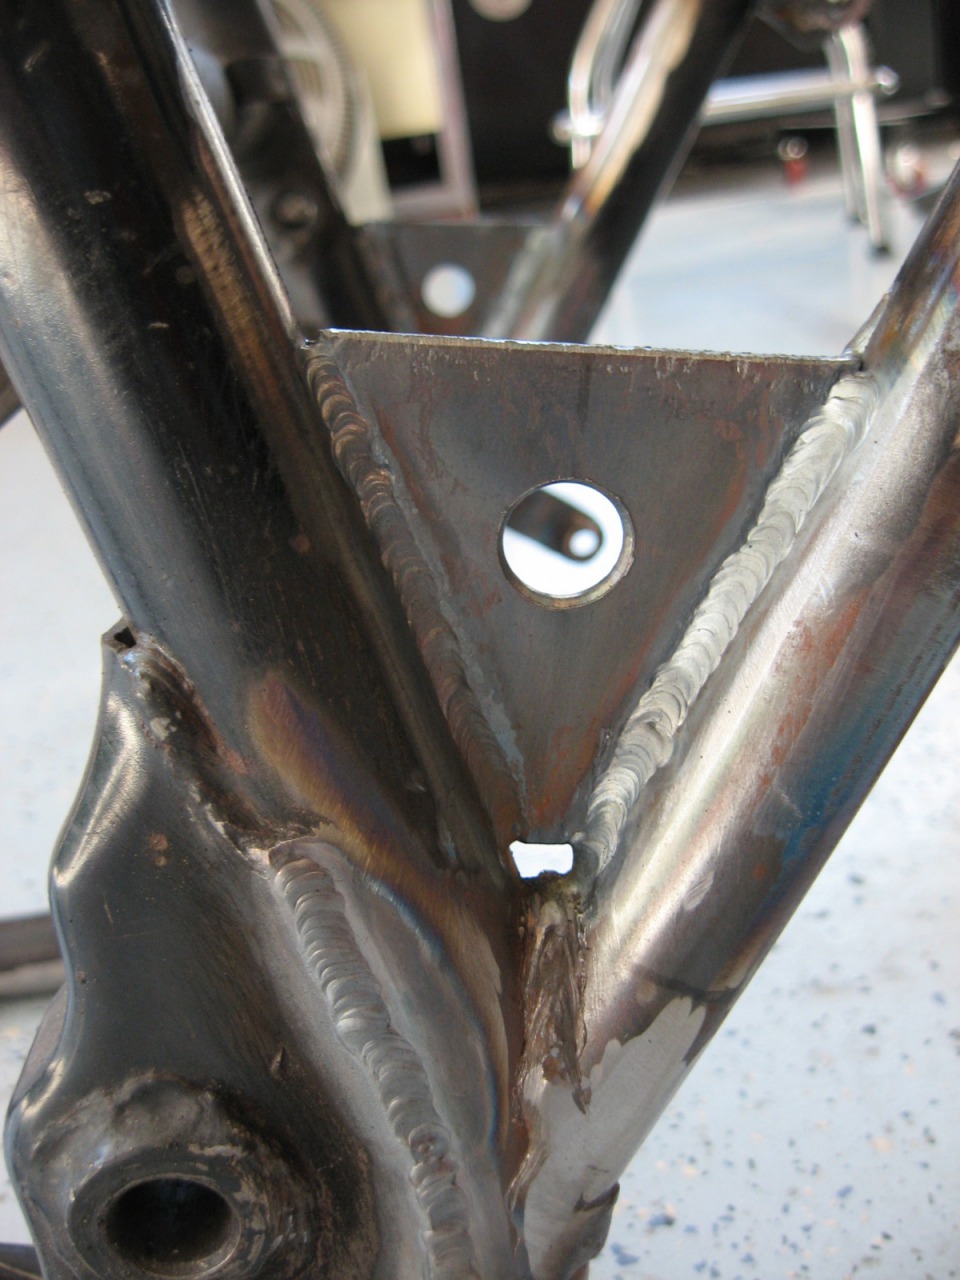
Next I had to weld on the steering stops and the fairing bracket mounting tabs shown below.
With all the frame welding and fabricating completed it was time for a bodywork on assembly to check if everything lined up and fit correctly. The fairing has a square headlight which I plan to ditch and use two round headlights to give it a 80’s style endurance racer look.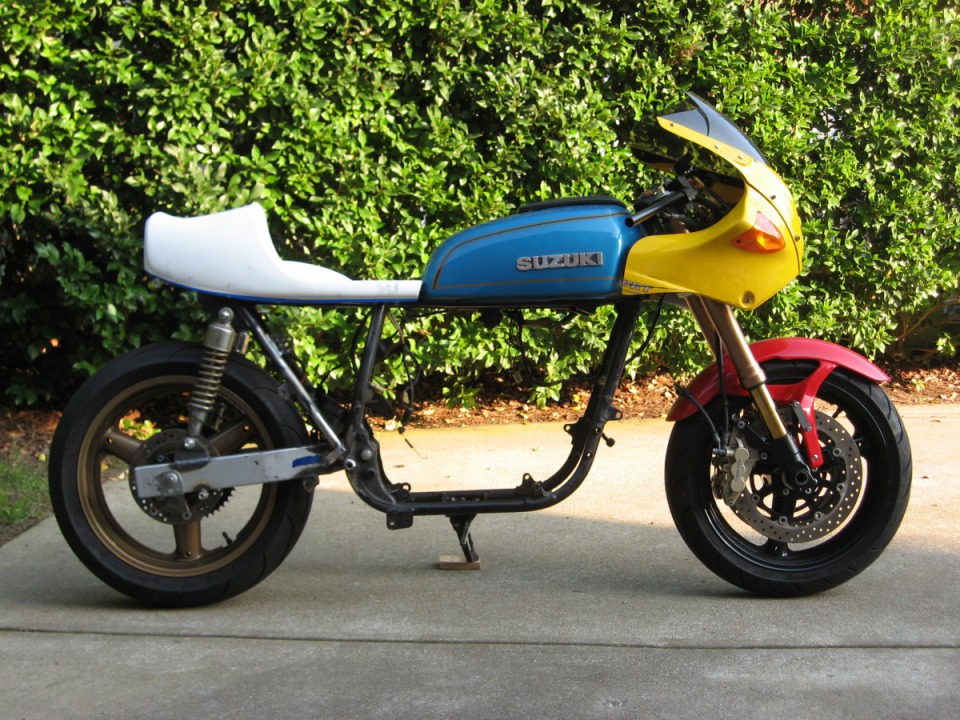
With all the cutting, welding and grinding completed it was time to send the frame, swingarm and some other larger parts off for powder coating. While that was going on I did some painting and powder coating of my own shown below.
While all that was going on these bad boys below showed up at my front door. Now this is getting exciting.
Although I like the bare metal look I wanted a more durable finish on these so I sent them off to be Jethot coated in Greensboro. Here is what they looked like when they came back.
Starting a new update here. Since the last update the frame has come back from powder coating and the rolling chassis has been assembled. The wheels were painted white, then finished with a clear coat containing a heavy dose of blue iridescent pearl flakes to give it an off white tint for that old school look.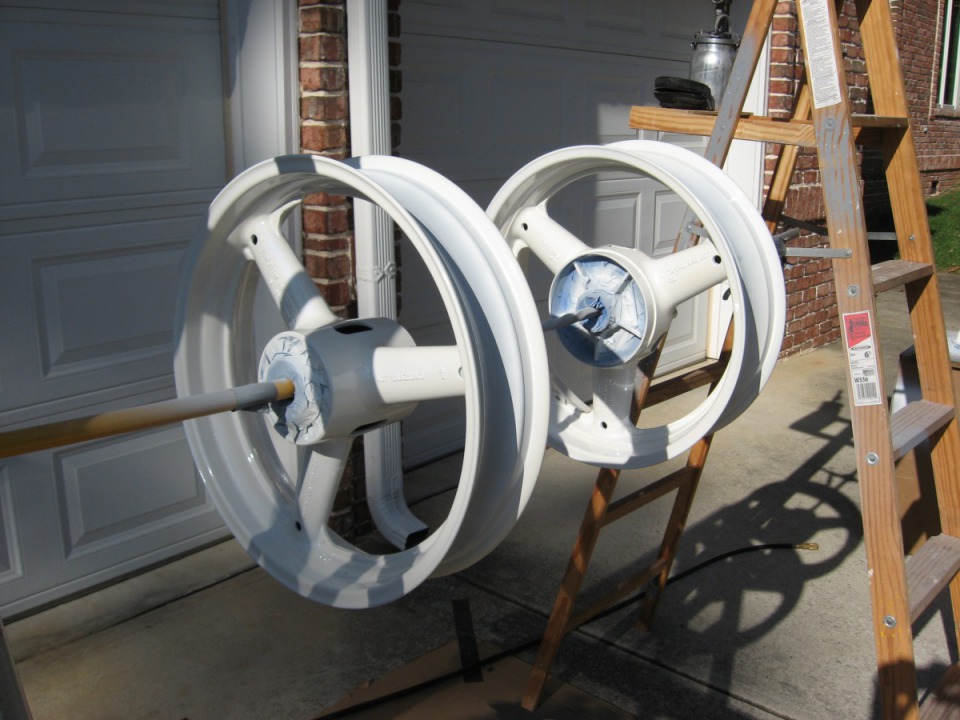
After I got the rolling chassis assembled, wiring installed and the brakes bled I rolled it off the lift to check the stance and brake operation. Here is a picture. Note the stock shocks, since I have not decided which shocks to go with.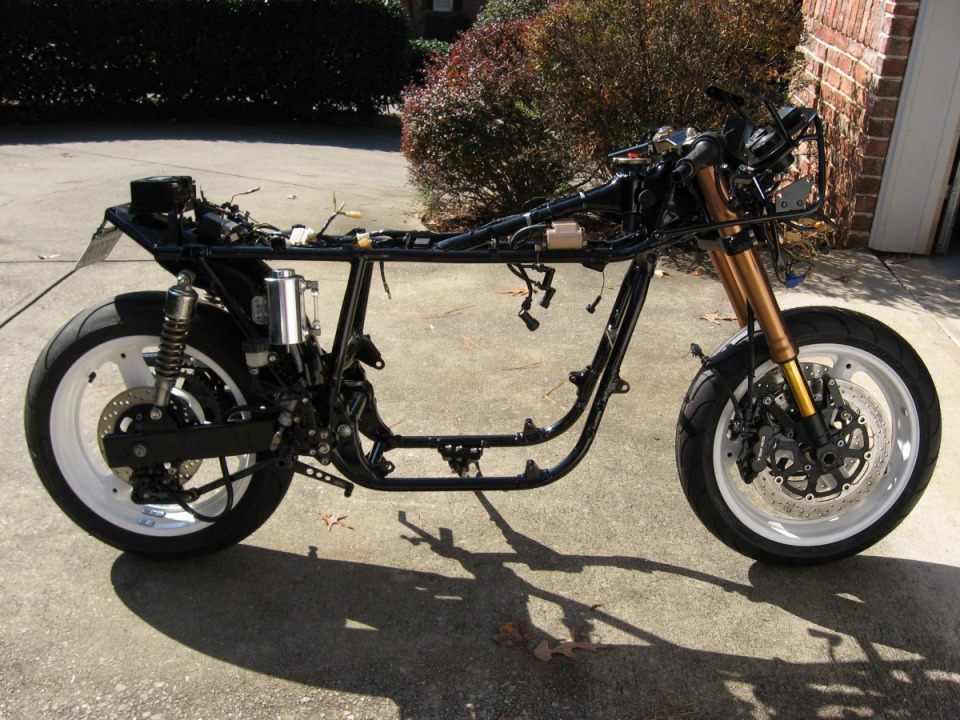
The instrument panel or dashboard was made to accommodate a mixture of old and new technology. You will note the stock temperature gauge and idiot lights with gear change indicator together with the modern Vapor gauge. I wired in the temp gauge from the Vapor as well since I wanted to have some accurate numbers on cooling.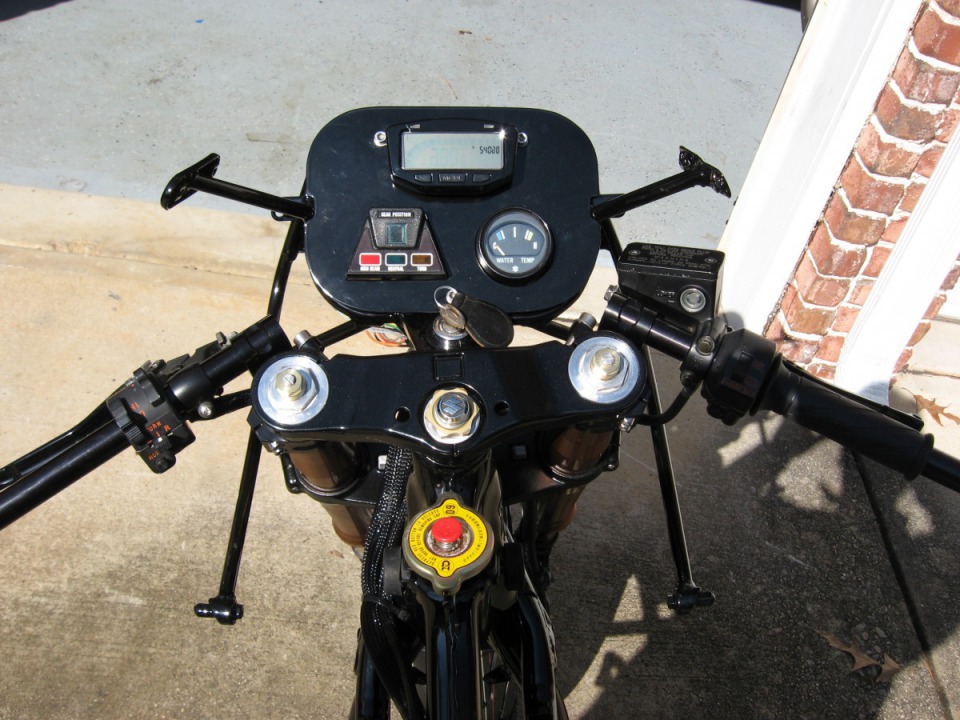
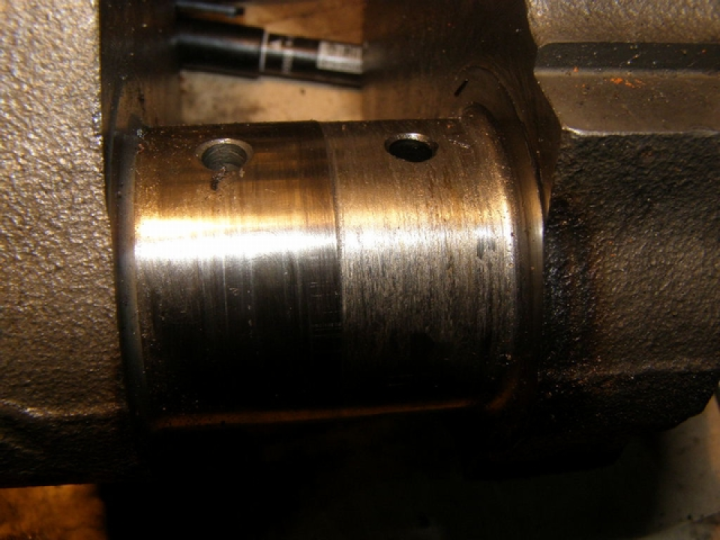
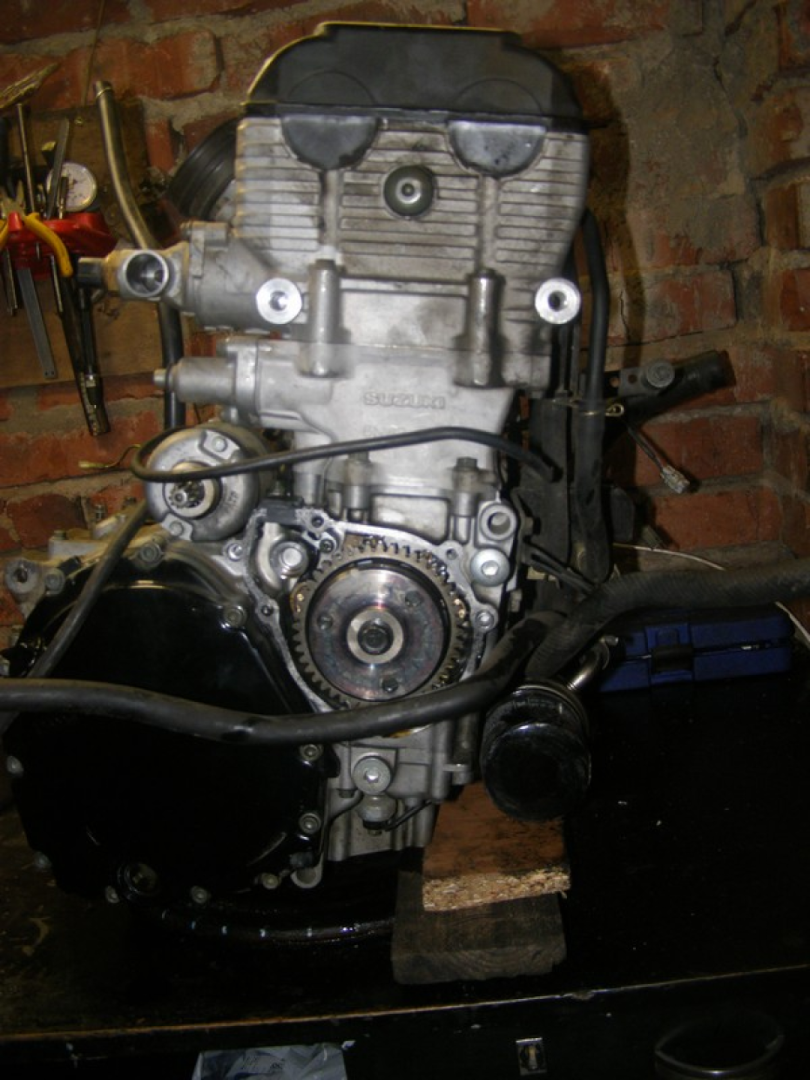
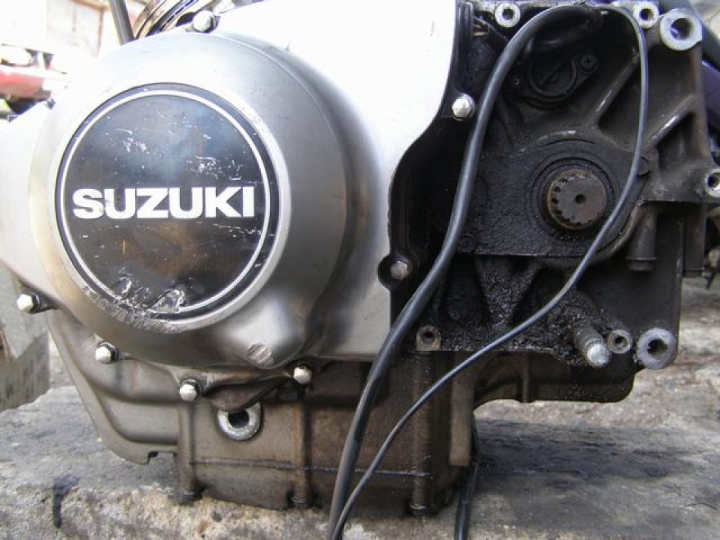
The motor was next on the list and I started by installing a new water pump. The old pump worked well enough but I did not want to take any chances. I had to make an extraction tool to get the pump out as shown in the picture below. There is an impeller that I already removed so it is not visible in the picture. The impeller required heat with a gas flame to get it off.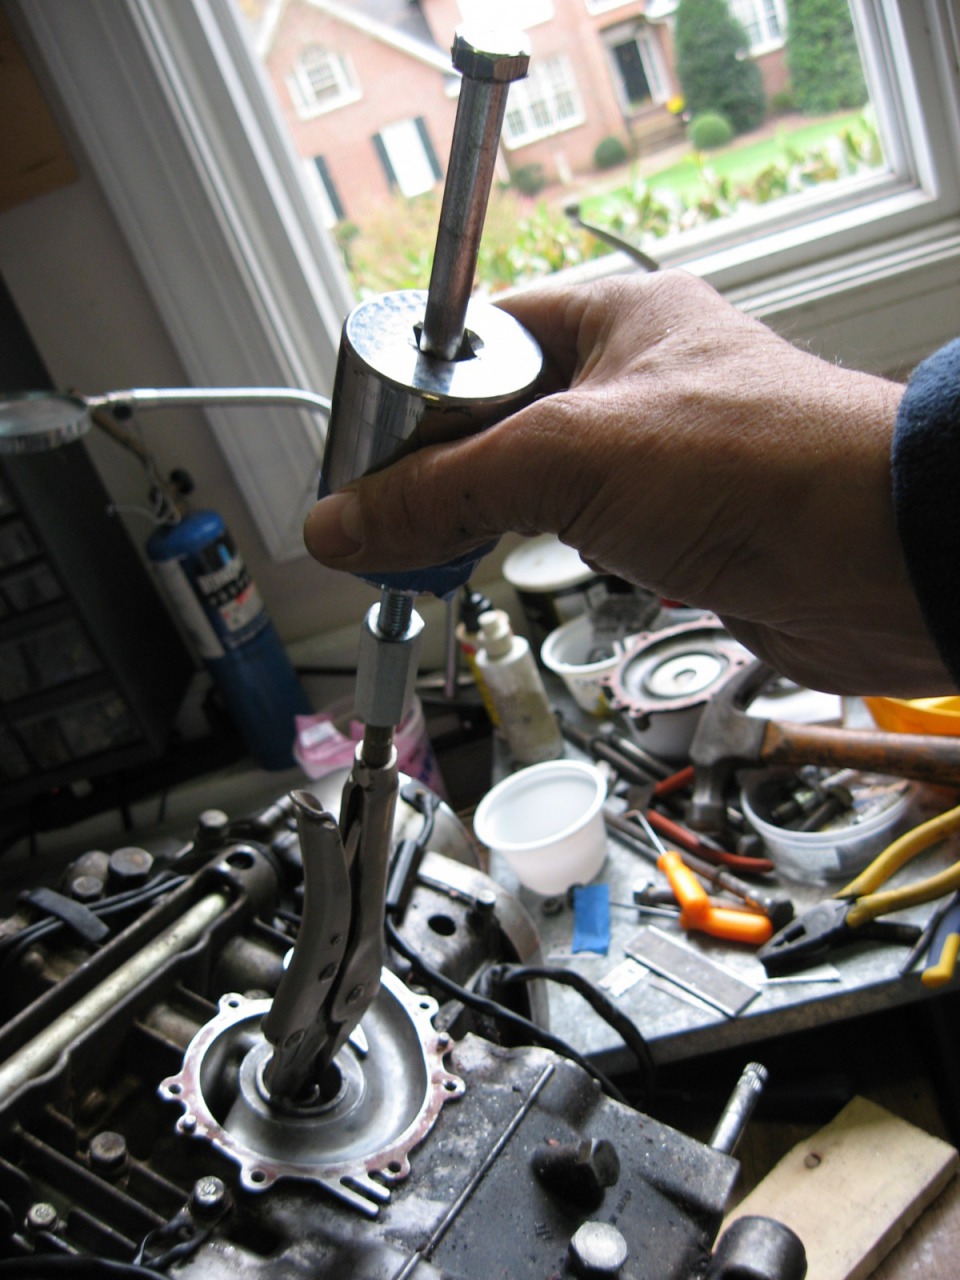
After I installed the new water pump I was ready to clean up the motor to paint it black. In keeping with the 80’s theme I had to paint the engine black with some silver or polished aluminum accents. Here is a picture of the installed motor all painted shiny in black. The finish cures with heat and will during the curing process lose some of the shine.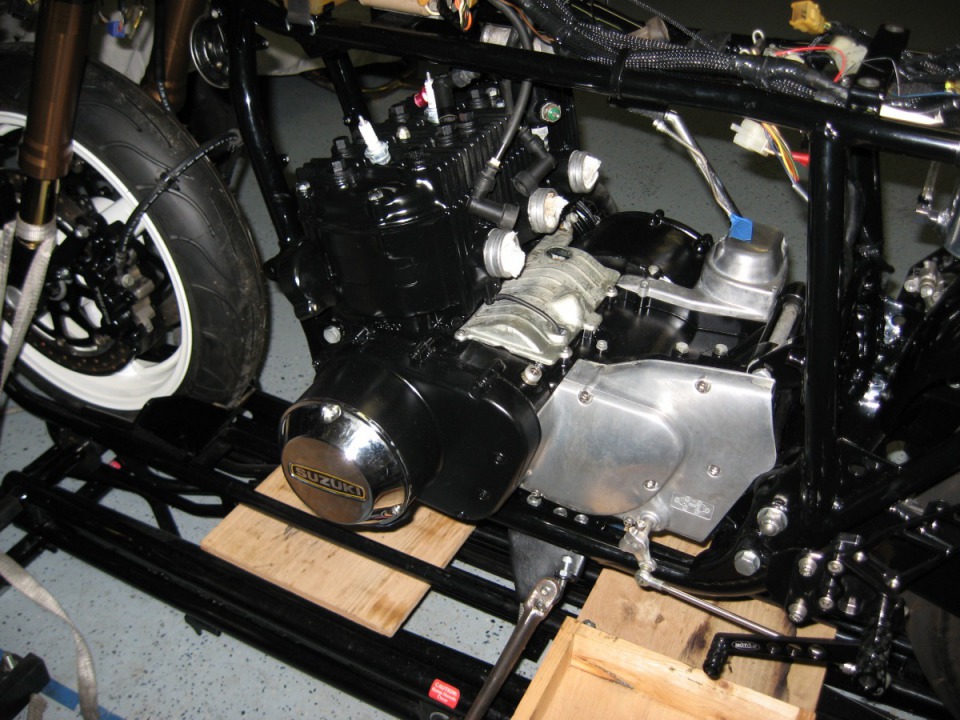
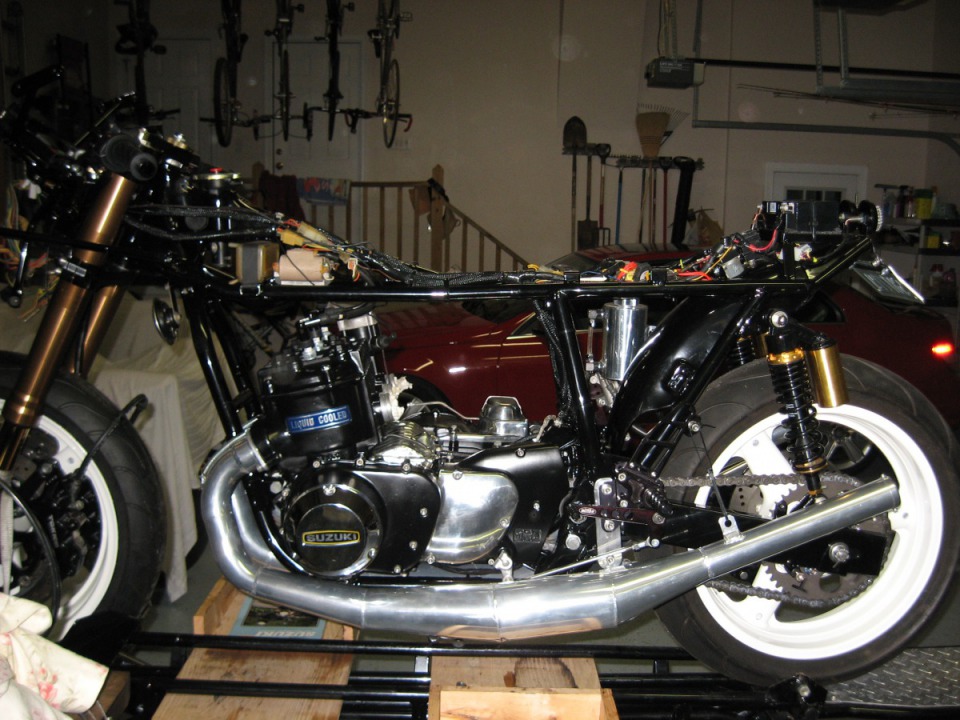
Next I polished the engine covers and installed the Jemco expansion Chambers. Incidentally, this was when I ran into the issue with the rear sets. You can see in the pictures below that I had made some plates to reposition the rear sets. The plates will be powder coated black to match the rear sets. You will also note that I now have some new rear shock installed in the pictures below. They are just some cheap Ohlins knockoffs I found on eBay.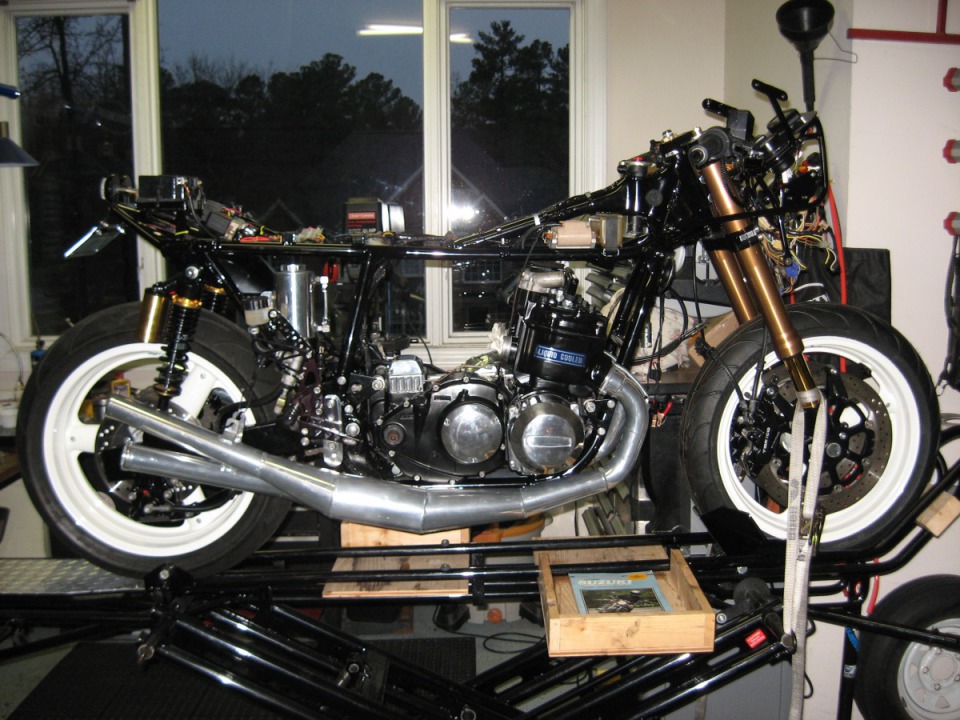
Next were the carburetors. I have no idea about jetting at this point so I installed main jest 2 sizes up from 110 to 115 (they go up in 2.5 sizes). The needles were moved to the second from highest setting. Here are some pictures of the carburetors after cleaning.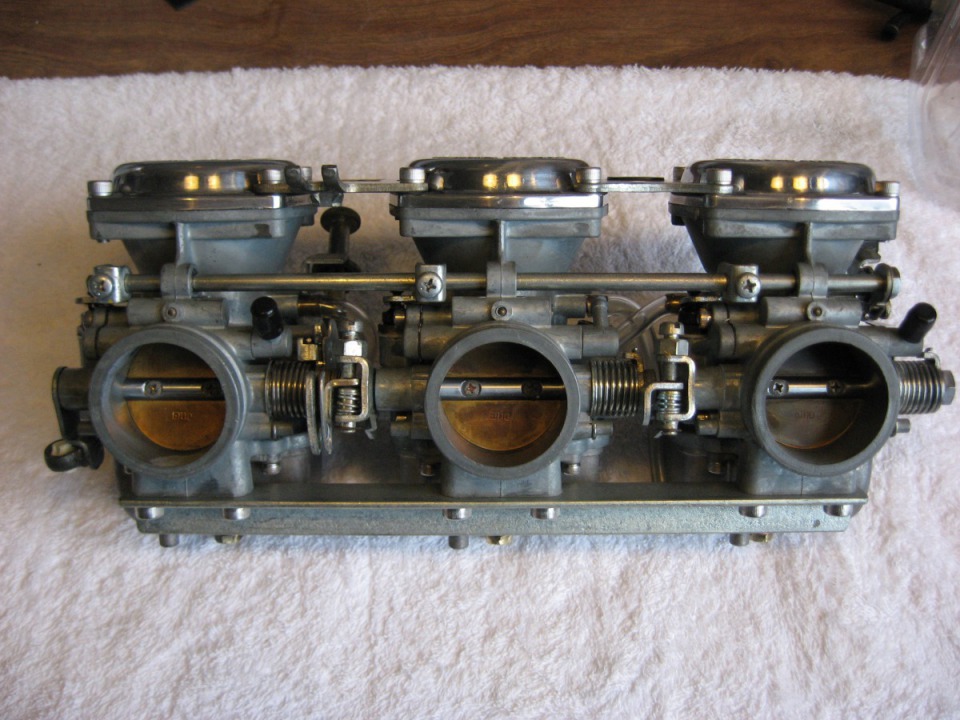
And here are the carburetors sporting some nice polished tops.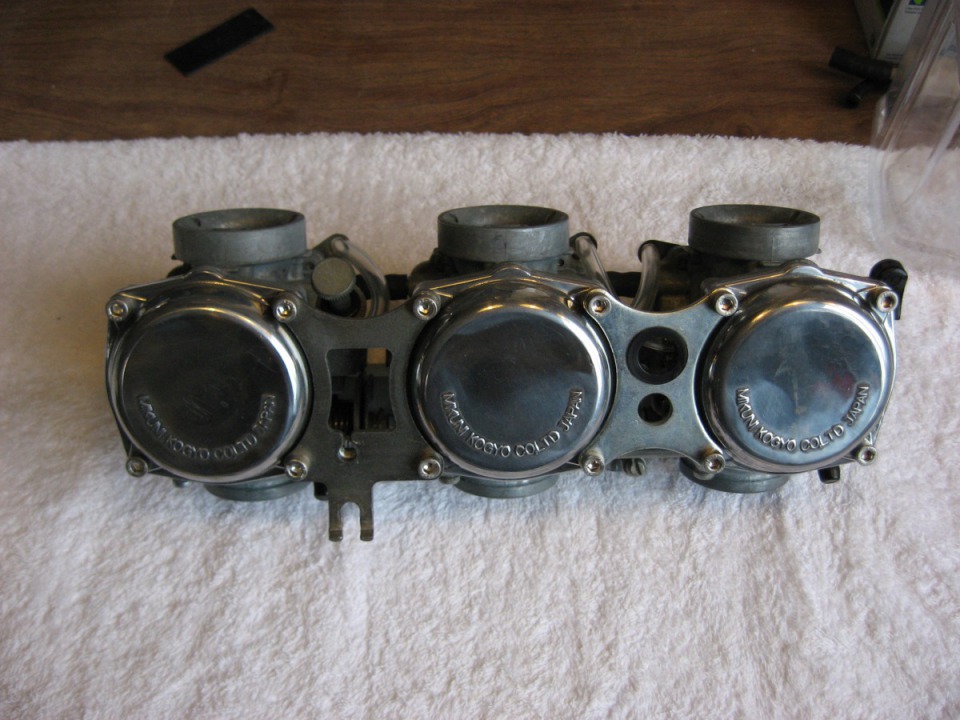
Next up I had to cut the holes in the fairing and the tail for the lights. I decided to use twin tail lights as well as twin headlights. Here are some pictures showing the rear end with tail lights, they are LED with built in turn signal lights.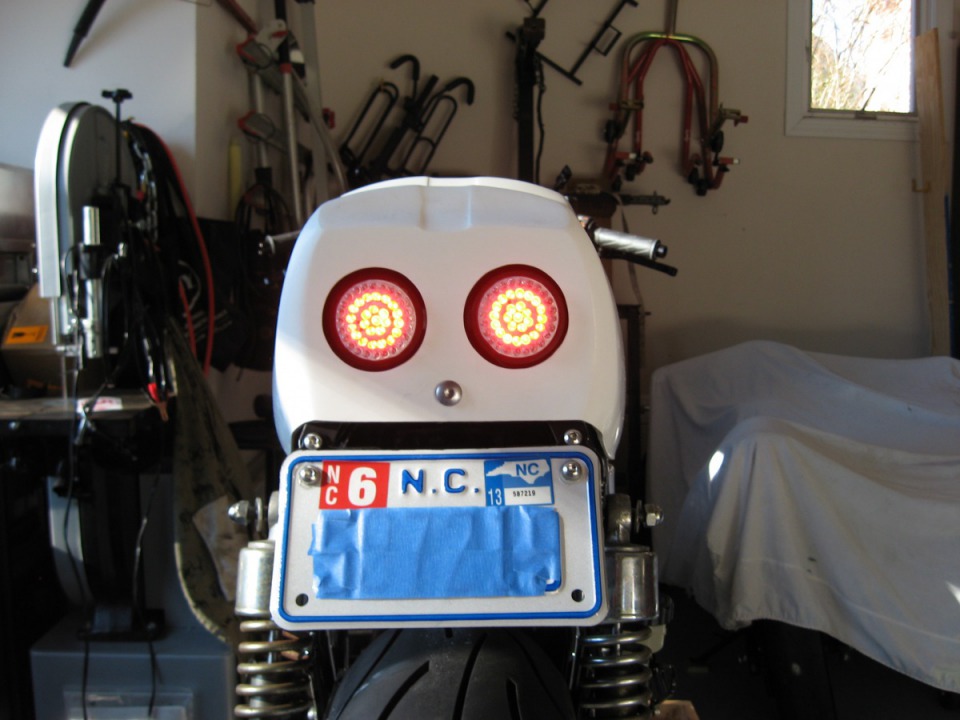
Here is a picture of the headlights installed and holes cut into the fairing. I had to make a special tool to help me mark the holes where I had to cut, to get them to fit perfectly.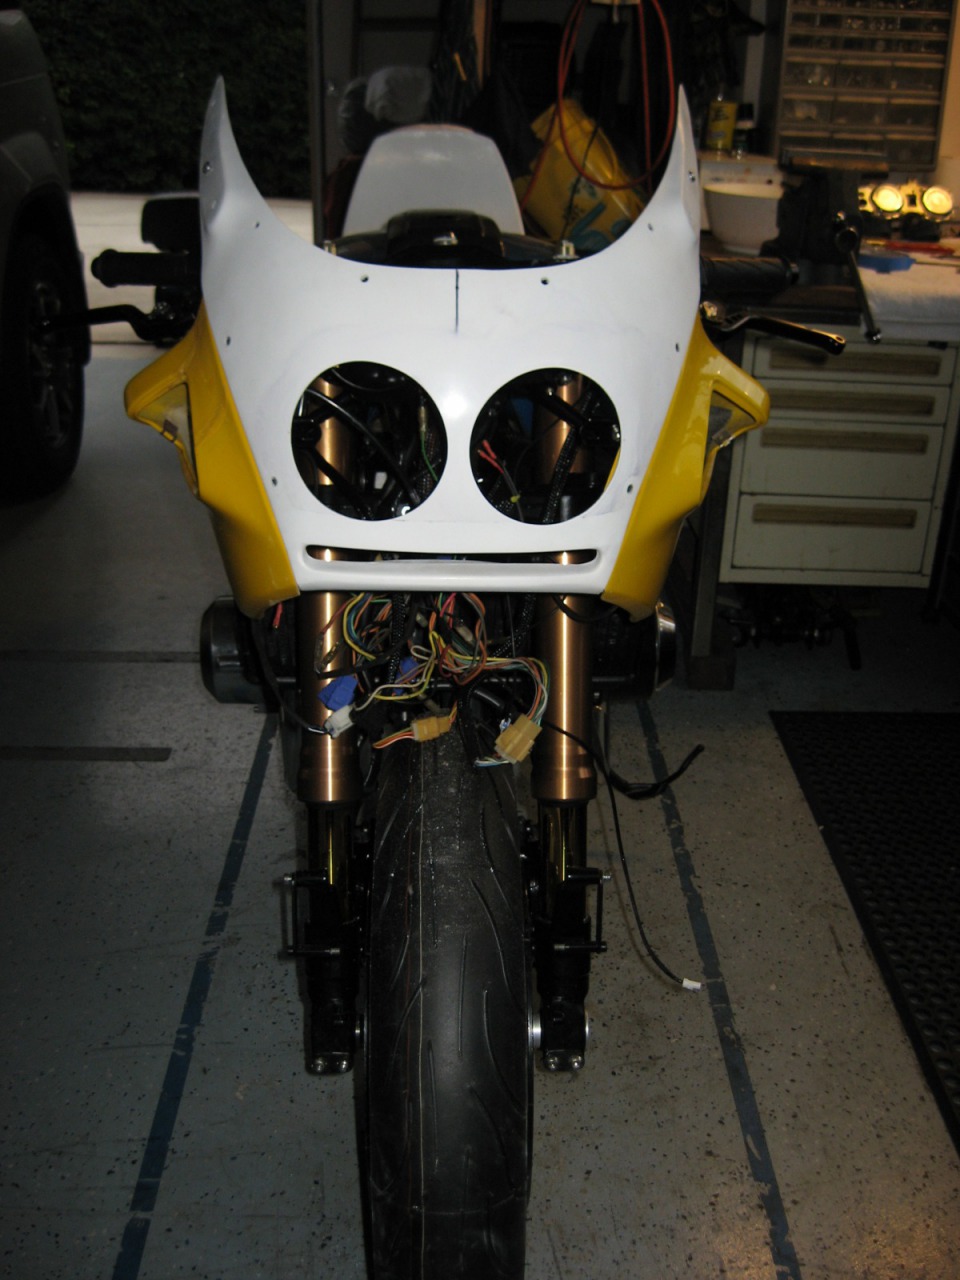
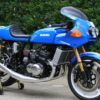
So I have pretty much done all of the fabrication work and the parts are now all ready for paint. I just have to make some exhaust hangers and mount the carburetors and I will be able to ride it. Here are some pictures of the assembly, before I strip it down for paint.
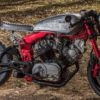
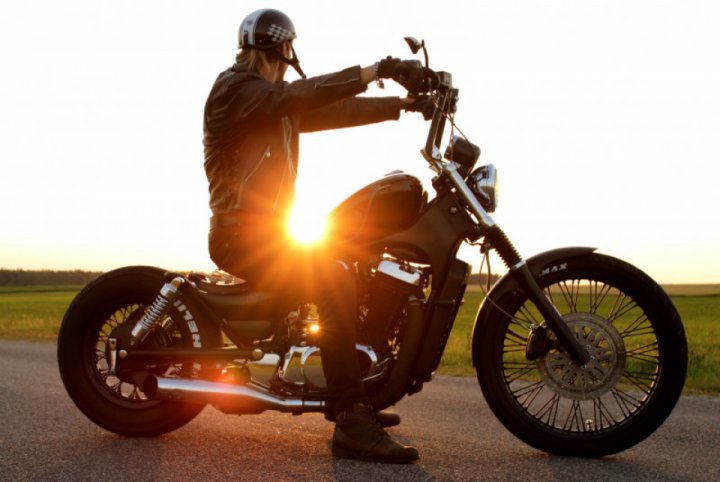
The first ride did not go too badly for the first 2 miles, then all of a sudden the bike started to lose power fast. My first thought was, holed pistons, please no let that not be it. So I pulled over to do see what is going on. As I kicked the side stand down and eased the bike over it started to run better, hhmm. Check the fuel petcock? Sure enough it was not on reserve and I had about 1 gallon of gas in there. So after riding slowly to the gas station and filling her up I went for another spin around the block and it now pulls like a train and has a very nice lively powerband. I guess pictures speak louder than words so I present to you Threesome, two stroke pleasure at it’s best.
 Follow
7.1K
Follow
7.1K